
 Exton|Defender SRS is a Linux system available as a Live DVD based on Fedora Rawhide, 64bit. (Rawhide is the development version of Fedora). Exton|Defender is for administrating or repairing your system and data after a crash. Exton|Defender aims to provide an easy way to carry out admin tasks on your computer, such as creating and editing the hard disk partitions. It comes with a lot of Linux software such as system tools and basic tools (editors, Midnight Commander, network tools). Exton|Defender can, however, also be used as a normal Linux Desktop System. It requires no hard drive installation, but can easily be installed to hard drive if you want. Desktop environments: Special versions of Deepin and Cinnamon developed by Fedora.
NEWS 231212 ABOUT Exton|Defender BASED ON upcoming Fedora 40
I had to upload a new version today since I discovered a way to run Exton|Defender fc40 from RAM also when starting Exton|Defender in UEFI mode. The previous Exton|Defender fc40 version could only run from RAM if it started up in Legacy mode. So my advice is to run this version SUPER FAST from RAM! The best way to run a Linux Live System! When Exton|Defender has booted up you can remove/eject the USB stick or the DVD. NOTE ALSO: In version 231212 I’ve managed to change Refracta Installer and Refracta Snapshot to GUI (Graphical User Interface) apps! They are therefore even easier to handle now! IMPORTANT NOTE: On some computers Exton|Defender still can’t run from RAM in UEFI mode. Only in Legacy mode. I don’t know why. Sort of a mystery.
231111: HAVE I GOT NEWS FOR YOU!
Today I discovered (by chance) that you can install Exton|Defender Build 231109 to a USB stick with persistence! I.e. all your system changes will be saved directly on the USB stick. Even big system upgrades! That will make it unnecessary to install Exton|Defender to hard drive (which can be a bit tricky). Just run the System from a big enough USB stick and be happy! Do it like this:
1. Use Rufus 4.3 for the installation.
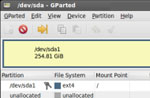
2. Set a Persistent partition size of about 3GB before you start the installation. Watch this screenshot…
3. Run Exton|Defender from your created USB stick. Be sure boot up the System in Legacy mode. You can run the System also in UEFI mode, but unfortunately persistence won’t be enabled then.
4. Test run Exton|Defender and change some things. For example new bookmarks in Firefox. Reboot!
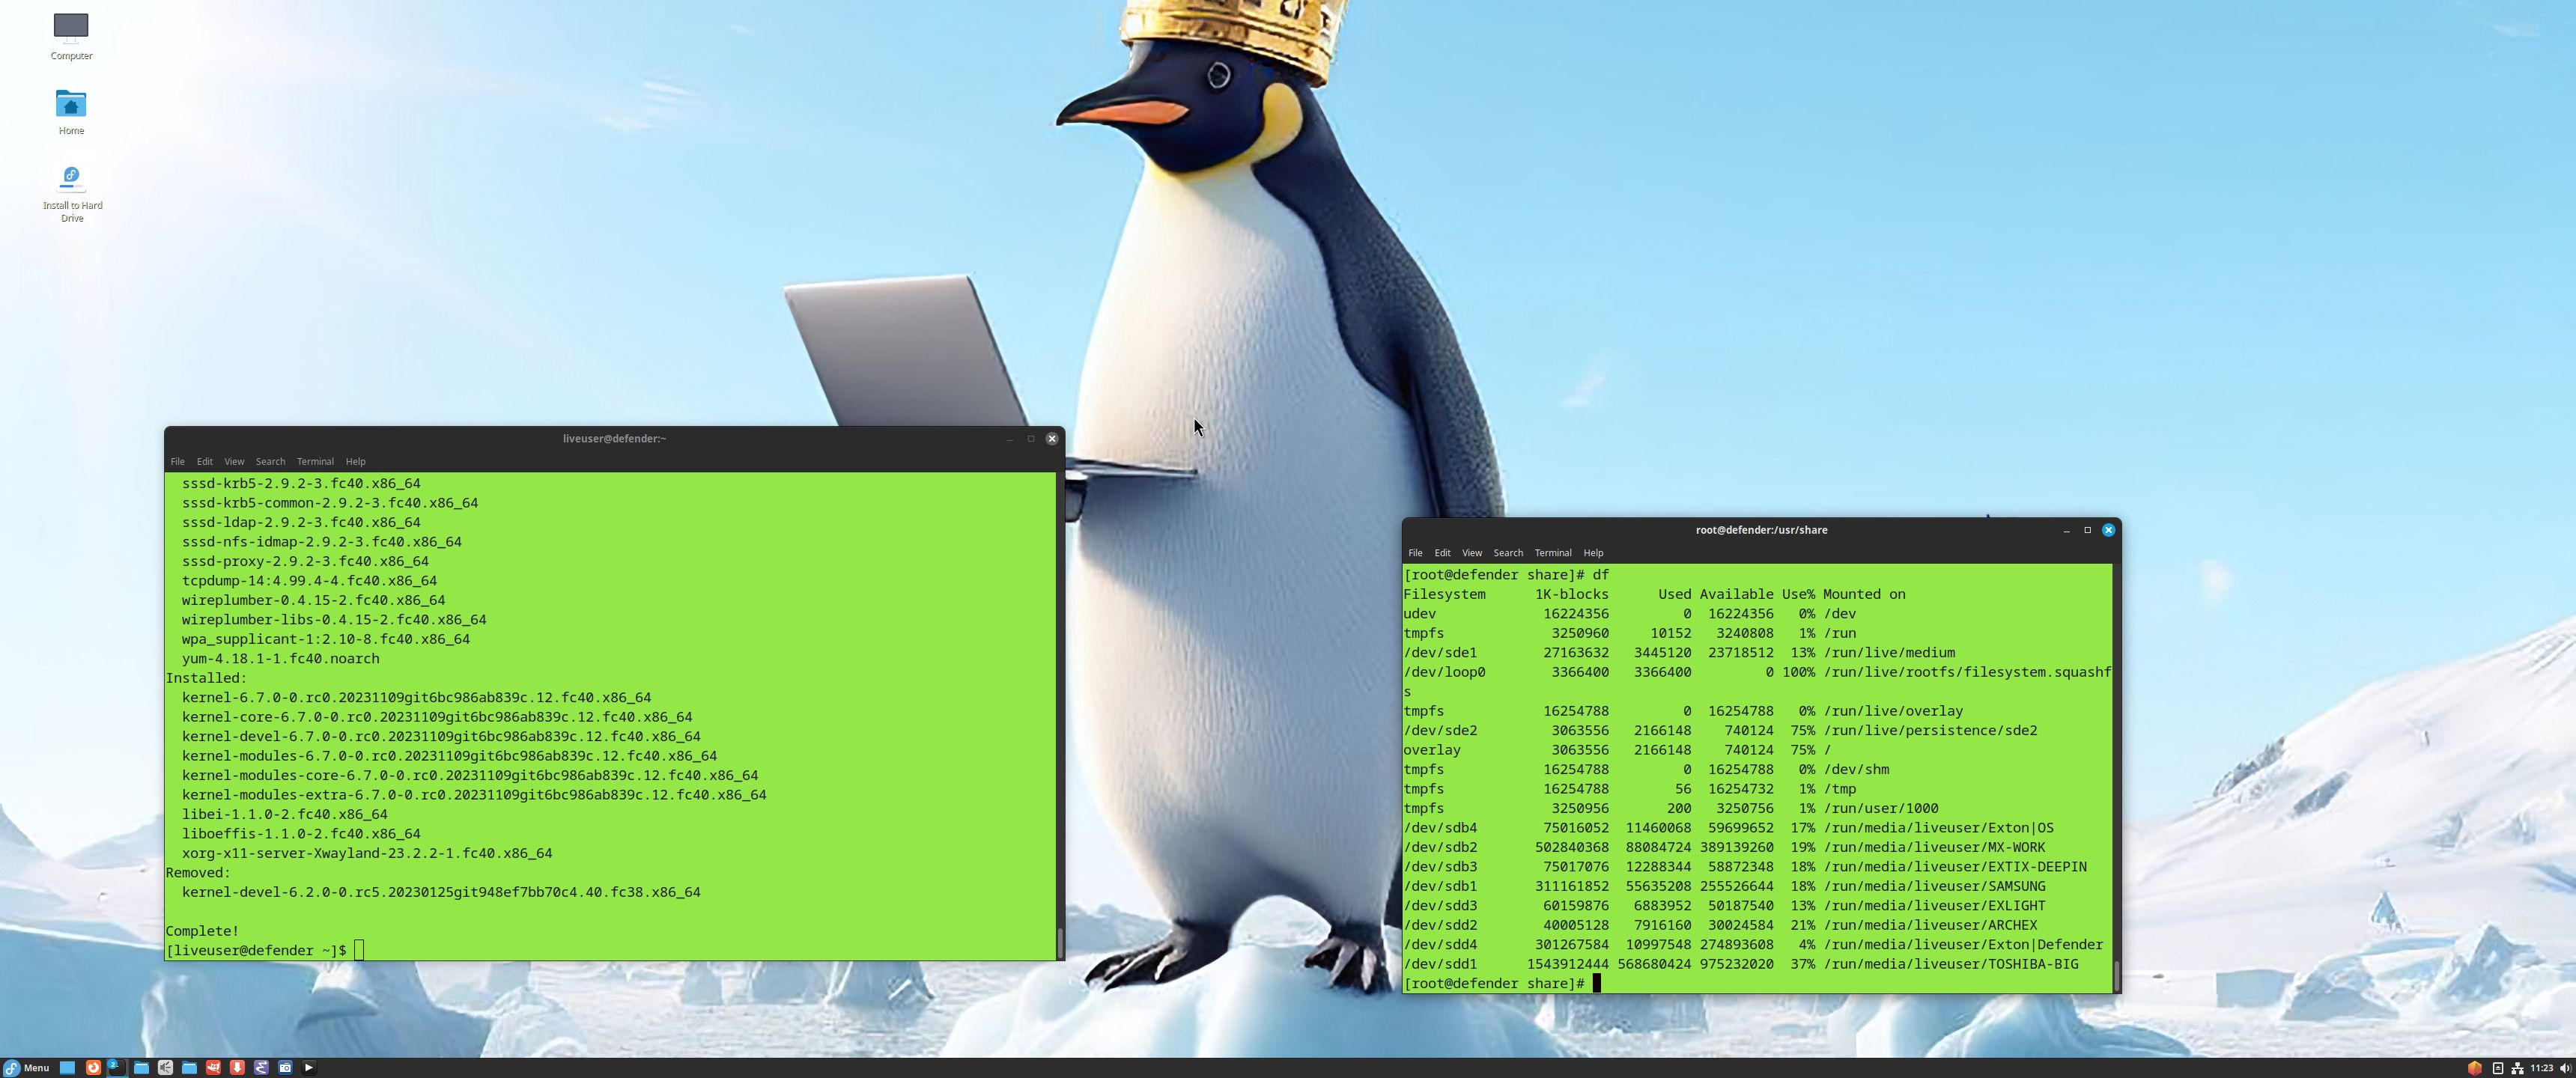
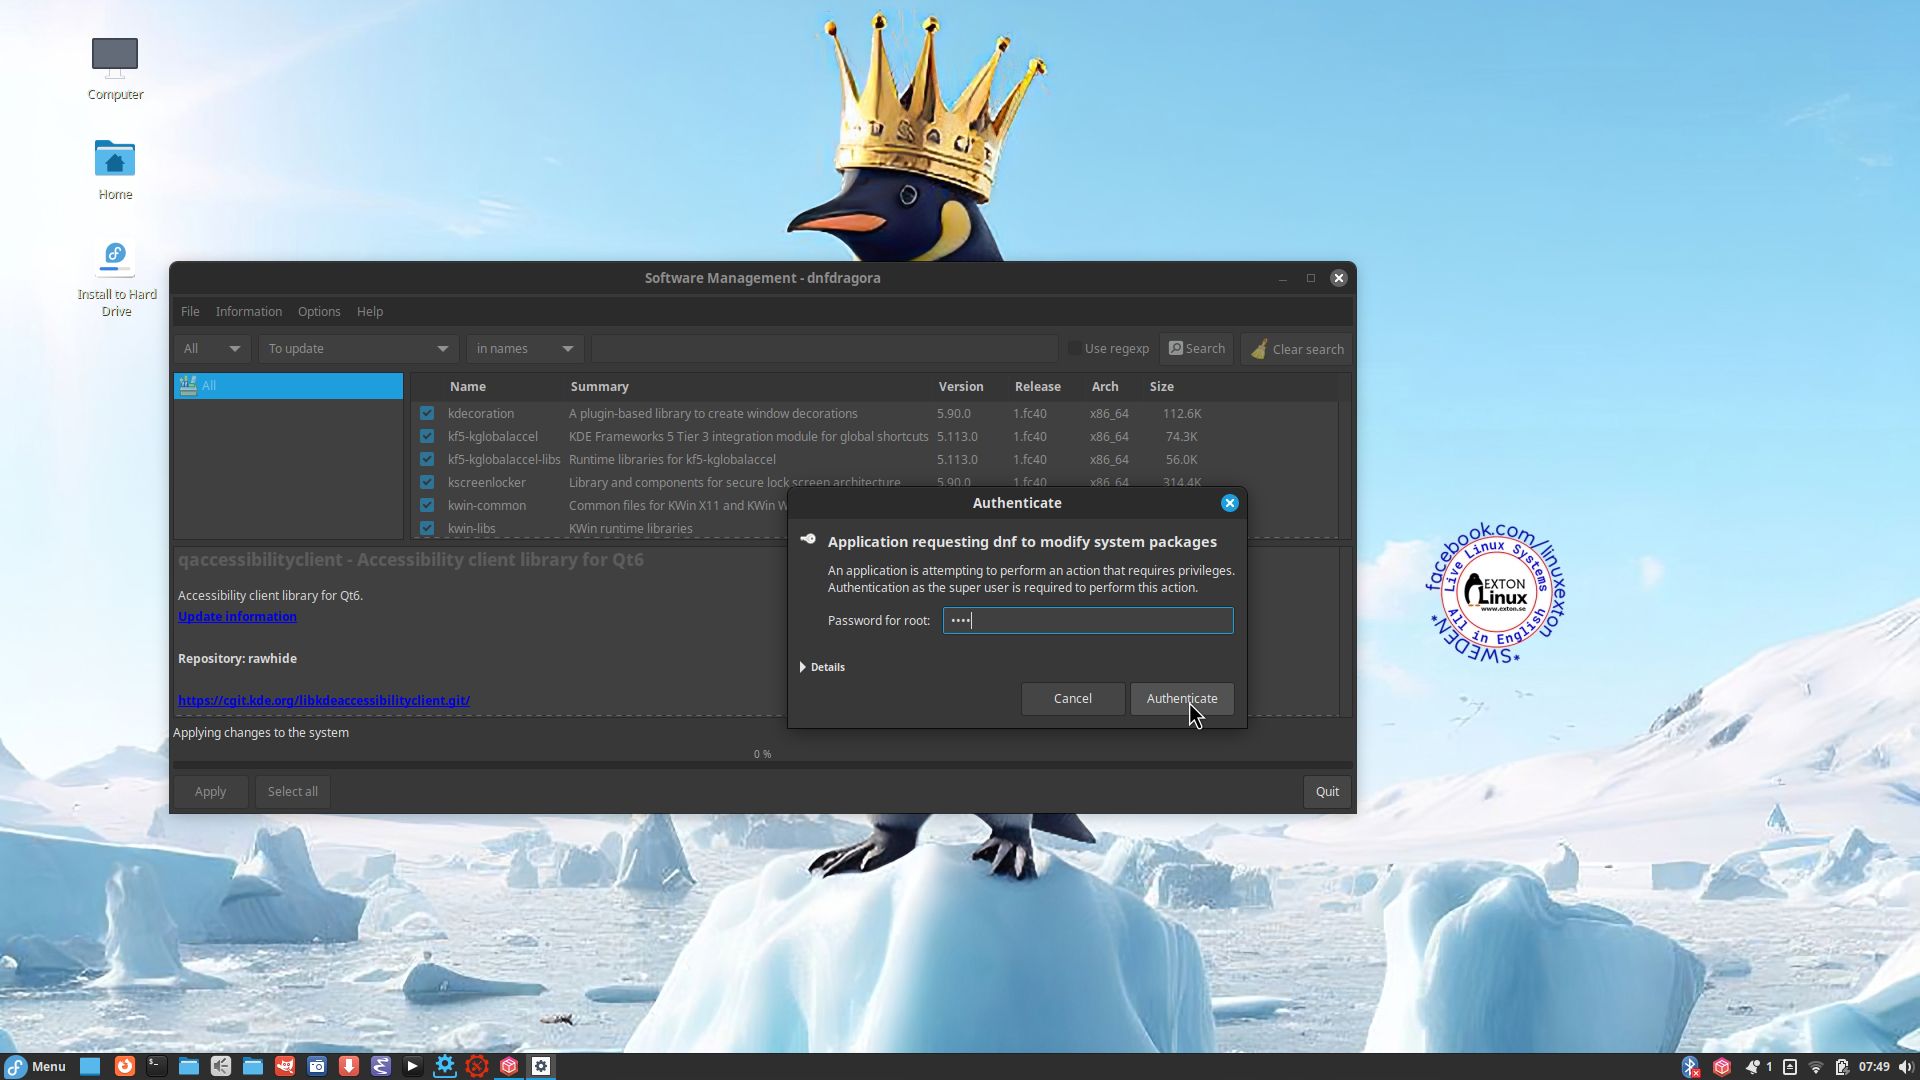
5. You changes should be left if you have done what I said above. Now you can upgrade the whole system with sudo dnf upgrade ‐‐refresh or just sudo dnf upgrade. About 230 packages can be upgraded as of 231111. Watch this screenshot…
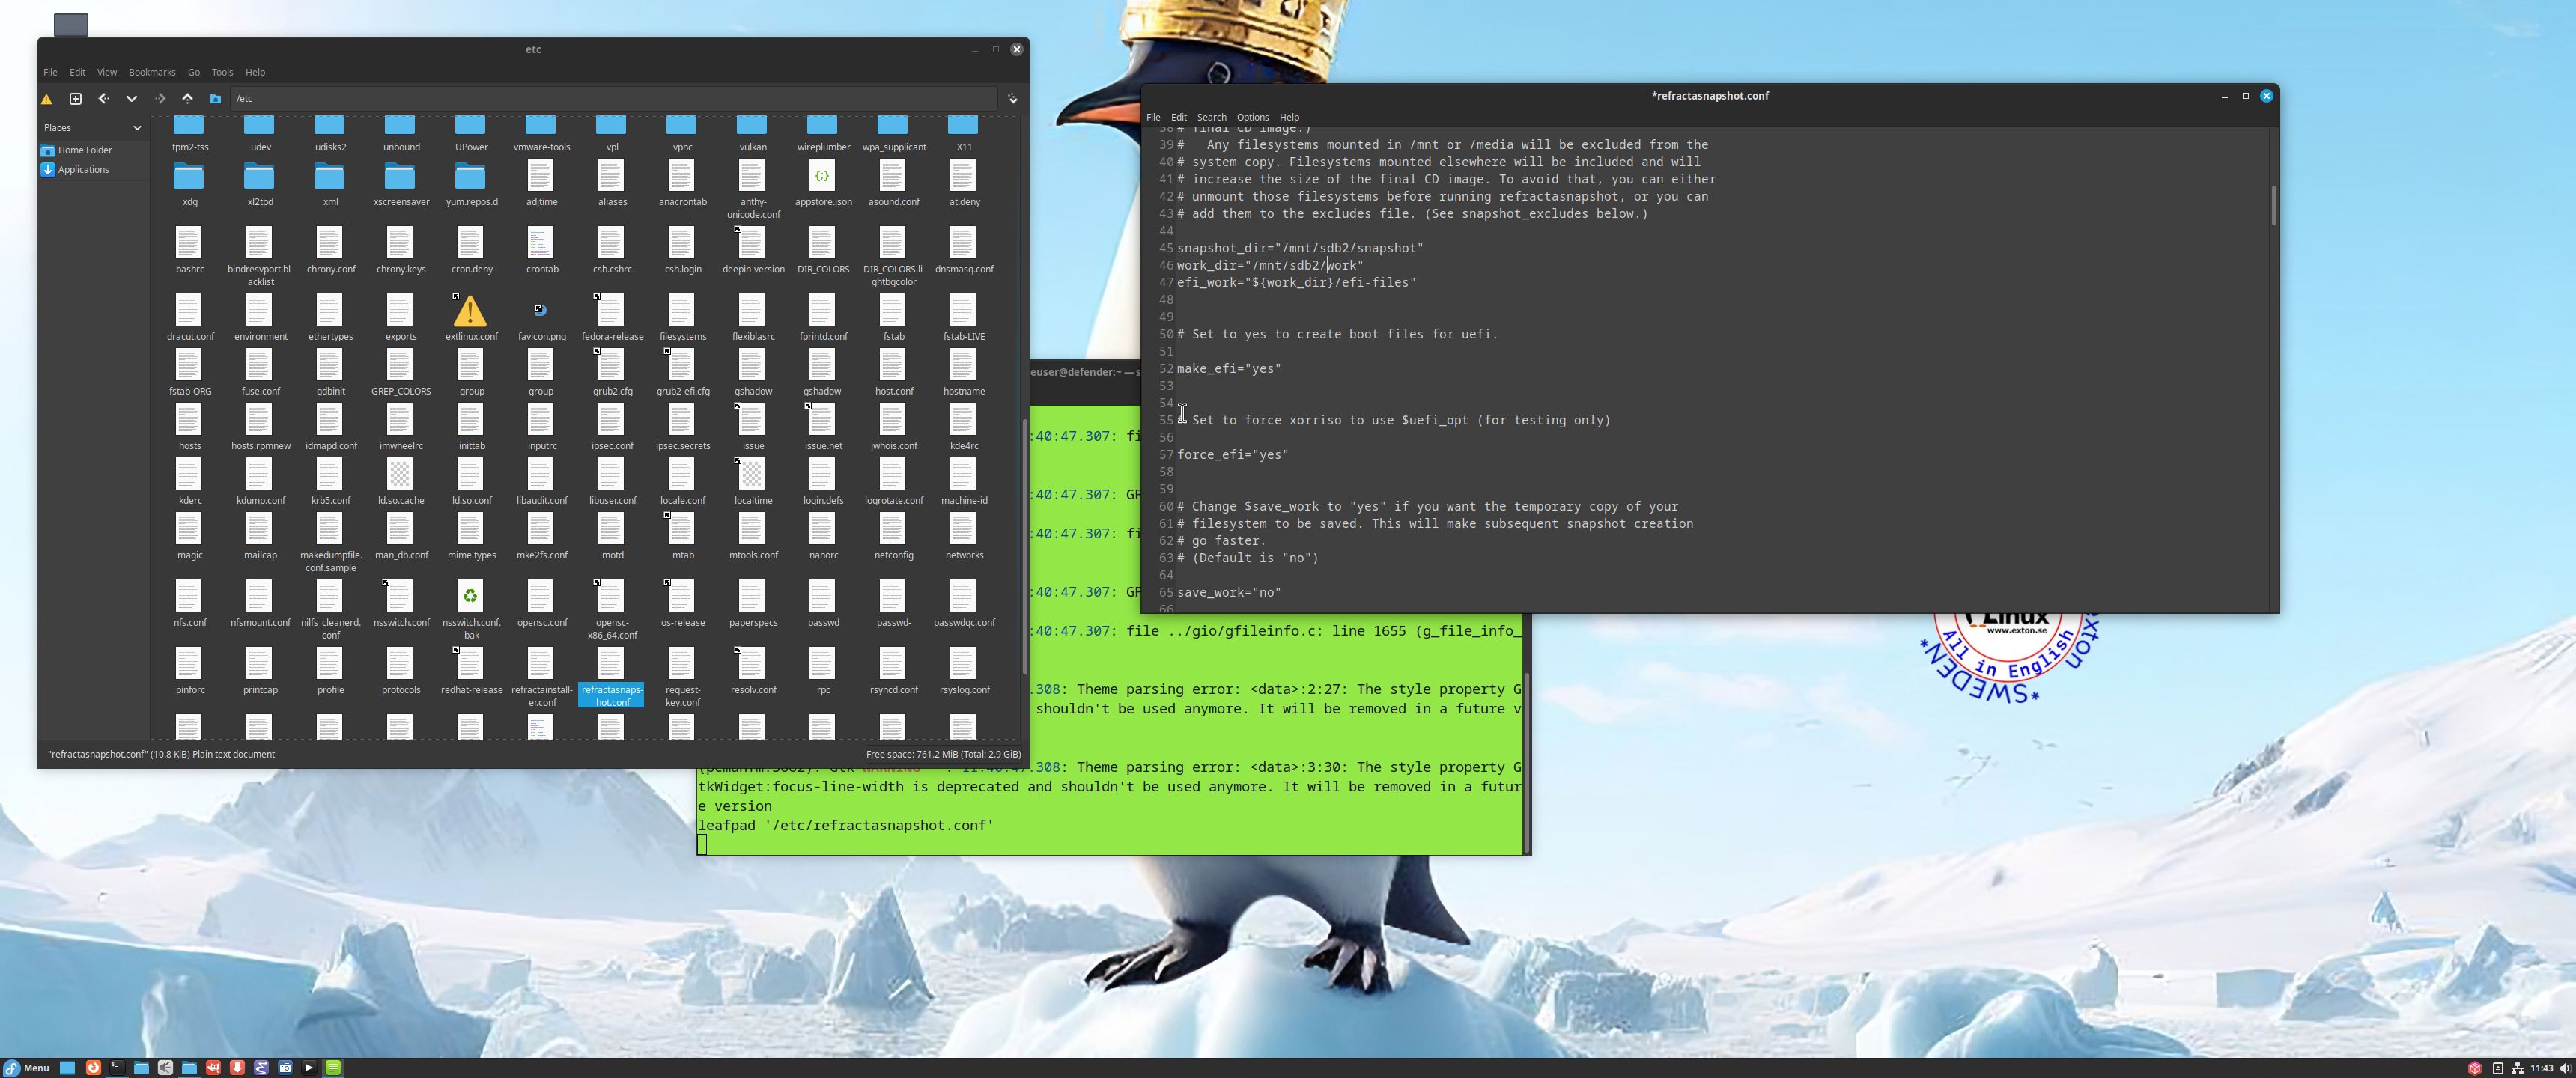
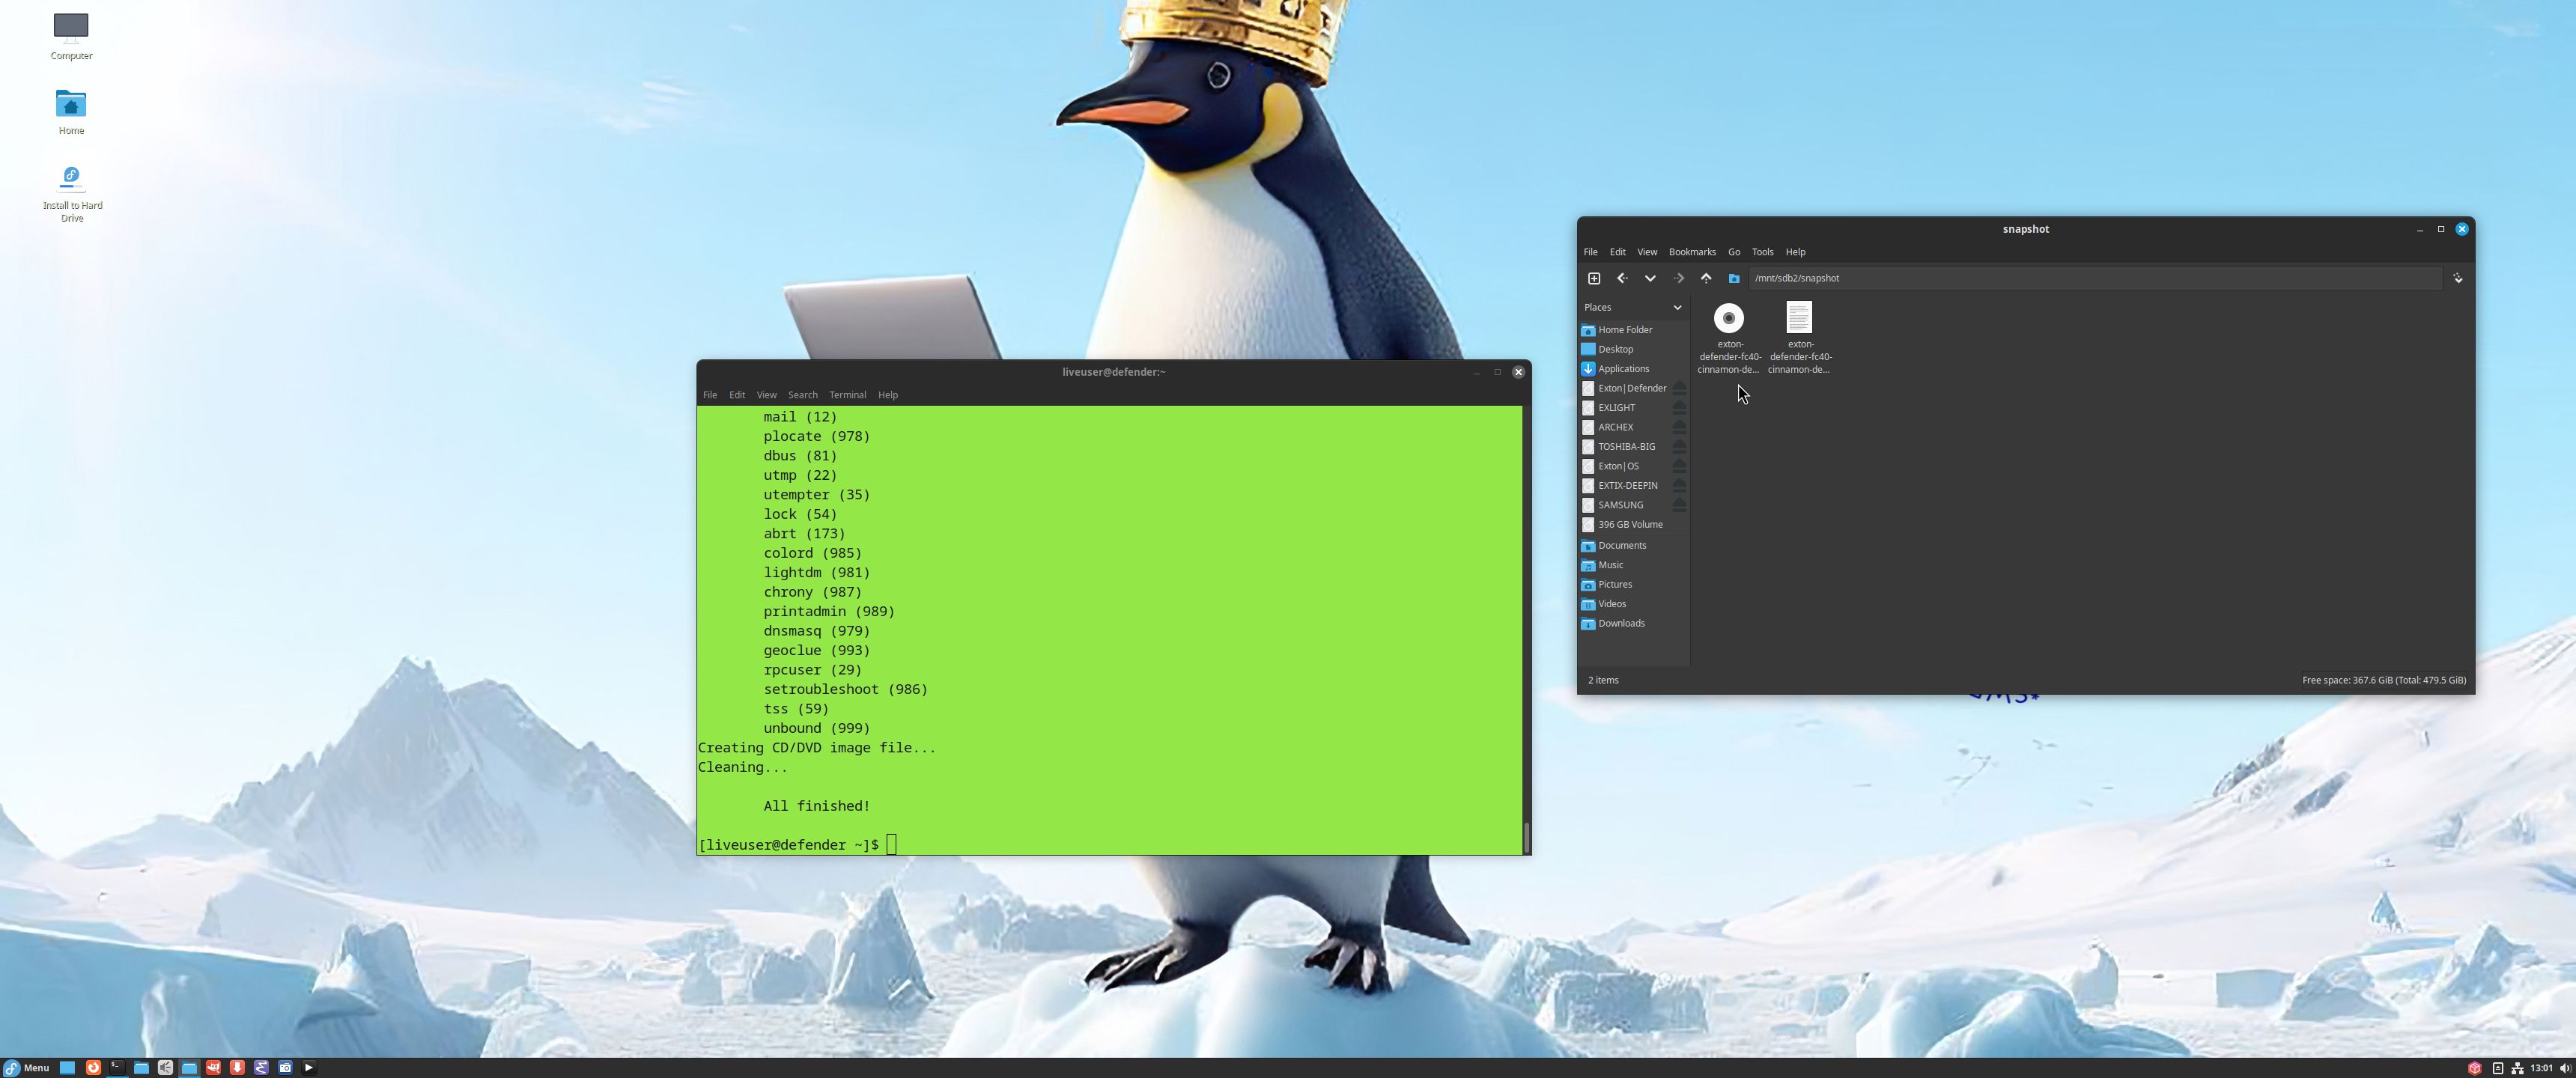
6. Finally you can make a new ISO (your own) if you want. Be sure to change /etc/refractasnapshot.conf first. You must see to that the new ISO file and the work environment will be created on another partition. Watch this screenshot…
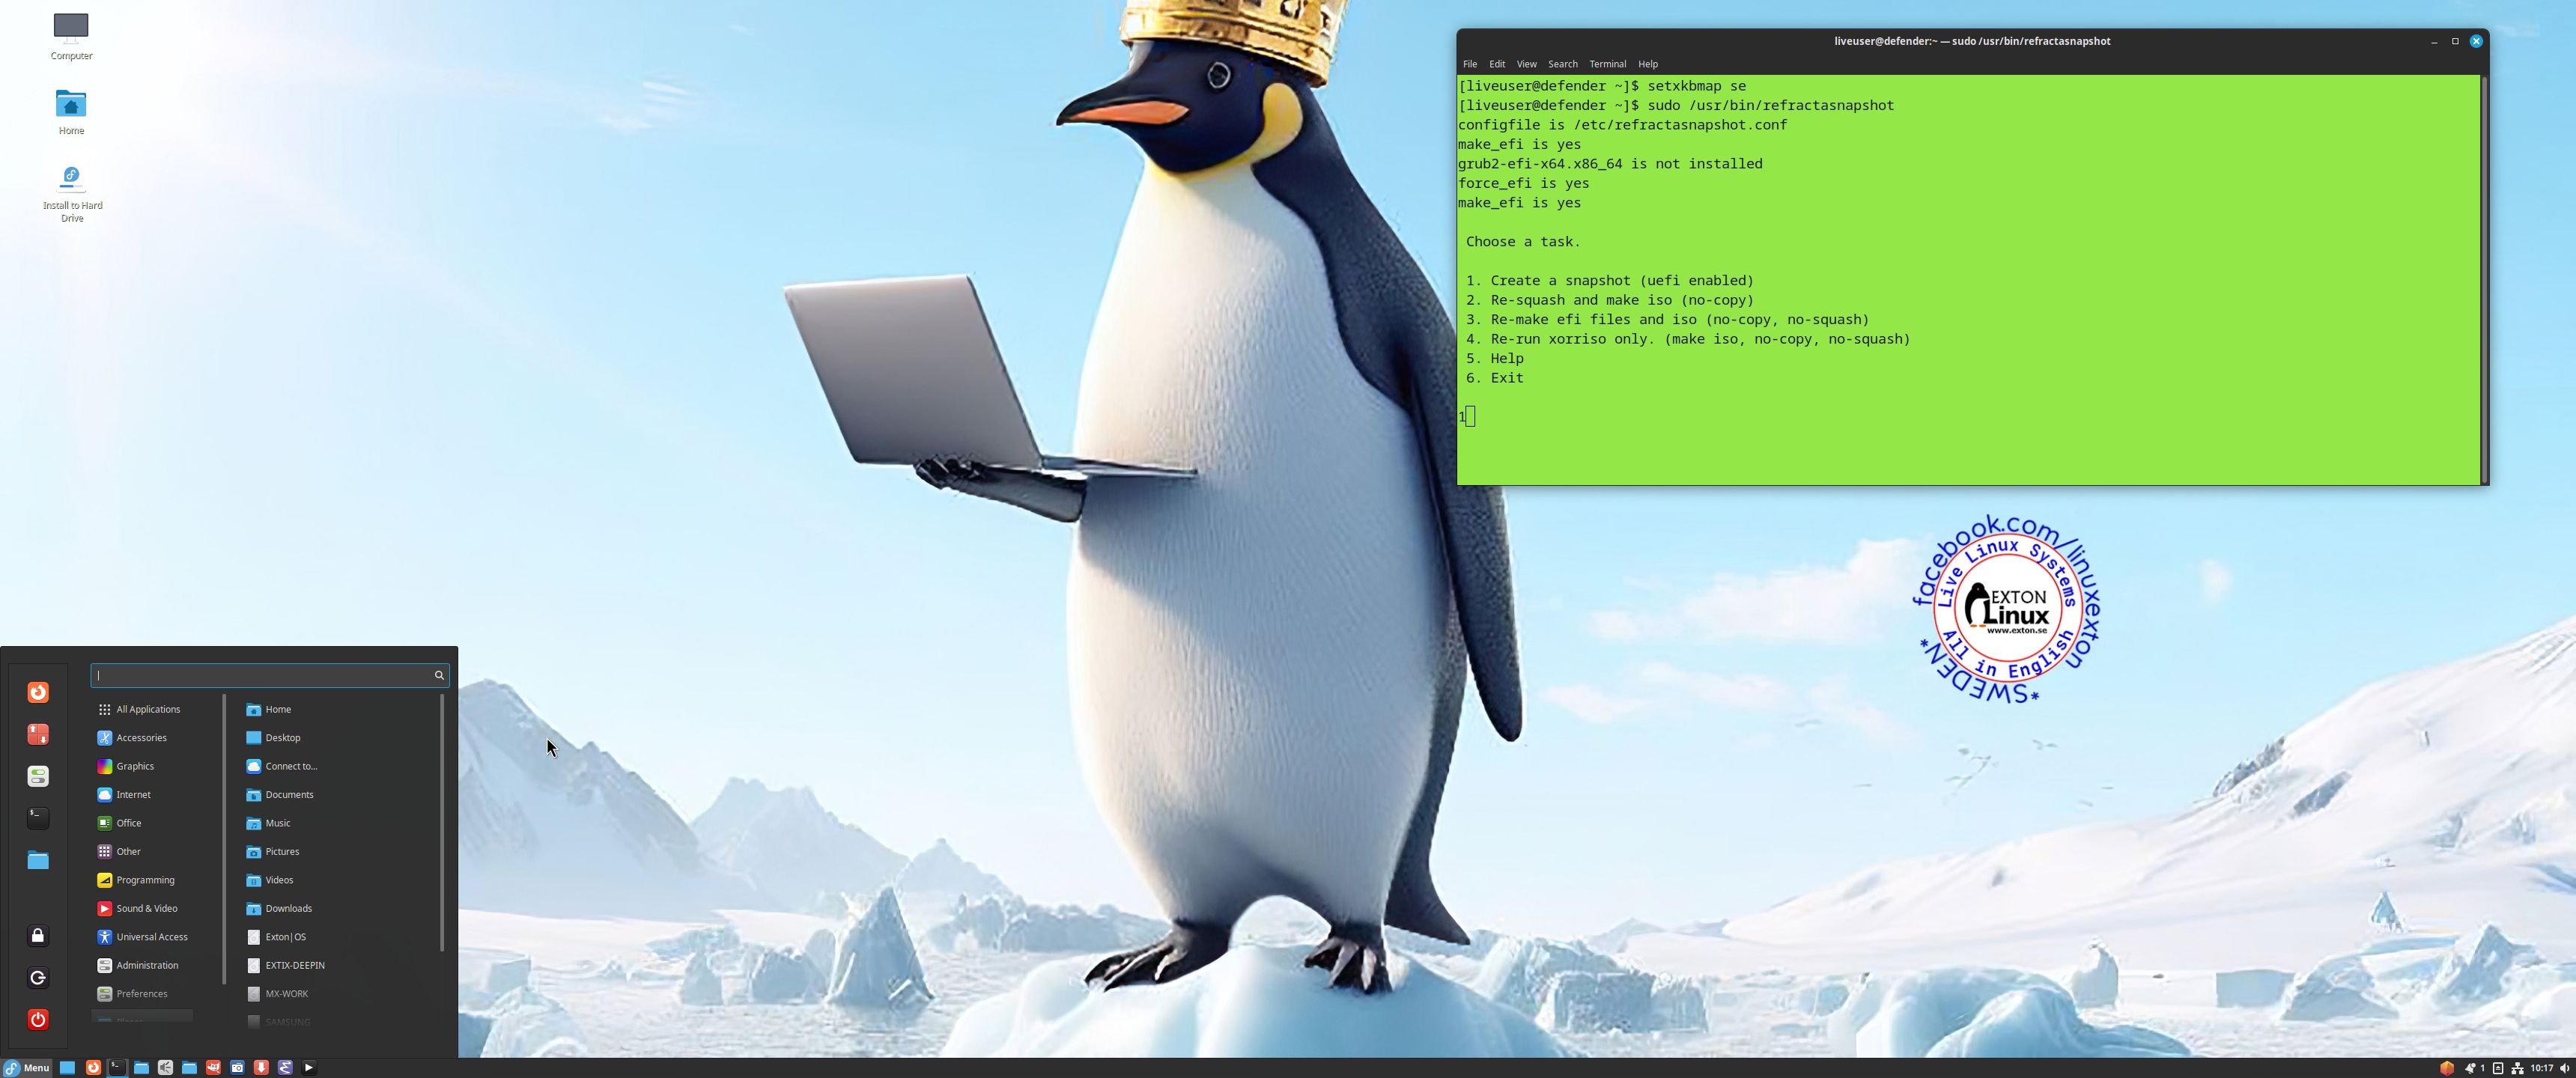
7. Start Refractasnapshot in a terminal with the command “sudo /usr/bin/refractasnapshot“. Follow the instructions. After a few minutes your ISO will be ready. Watch this screenshot…
Exton|Defender Boot Screen when booting in Legacy mode from a USB stick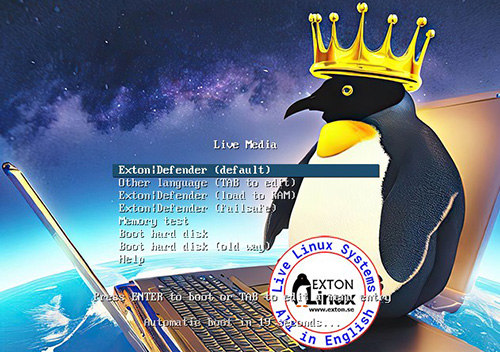
MORE IMPORTANT INFO 231212/231111
Unfortunately I’ve found one bug in Exton|Defender Build 231212/231109. You must install to hard drive on a partition formatted with the ext3 filesystem! If you install on an ext4 partition the System won’t boot. There will be filesystem errors and the boot loader (Grub2) won’t find the partition. What I just said is valid for both Anaconda Installer and Refracta Installer. You can check the filesystem on your install partition with the command “grub-probe ‐‐target=fs –device /dev/sdb3” (example)
The correct answer shall be: “ext2”
NEWS 231212/231109 ABOUT Exton|Defender Rawhide (Fedora 39/40)
I’ve made a new version of Exton|Defender 64 bit based on Fedora “Rawhide” (the development version of Fedora). I.e. upcoming Fedora 40. This new version uses the Cinnamon and Deepin Desktops. Log in to the Desktop environment you prefer. Study all other installed packages.
MOST IMPORTANT CHANGE: I’ve finally managed to install Refracta Snapshot in Exton|Defender, which means that you can create your own Fedora Rawhide System! I mean change everything to your liking and then create a new ISO.
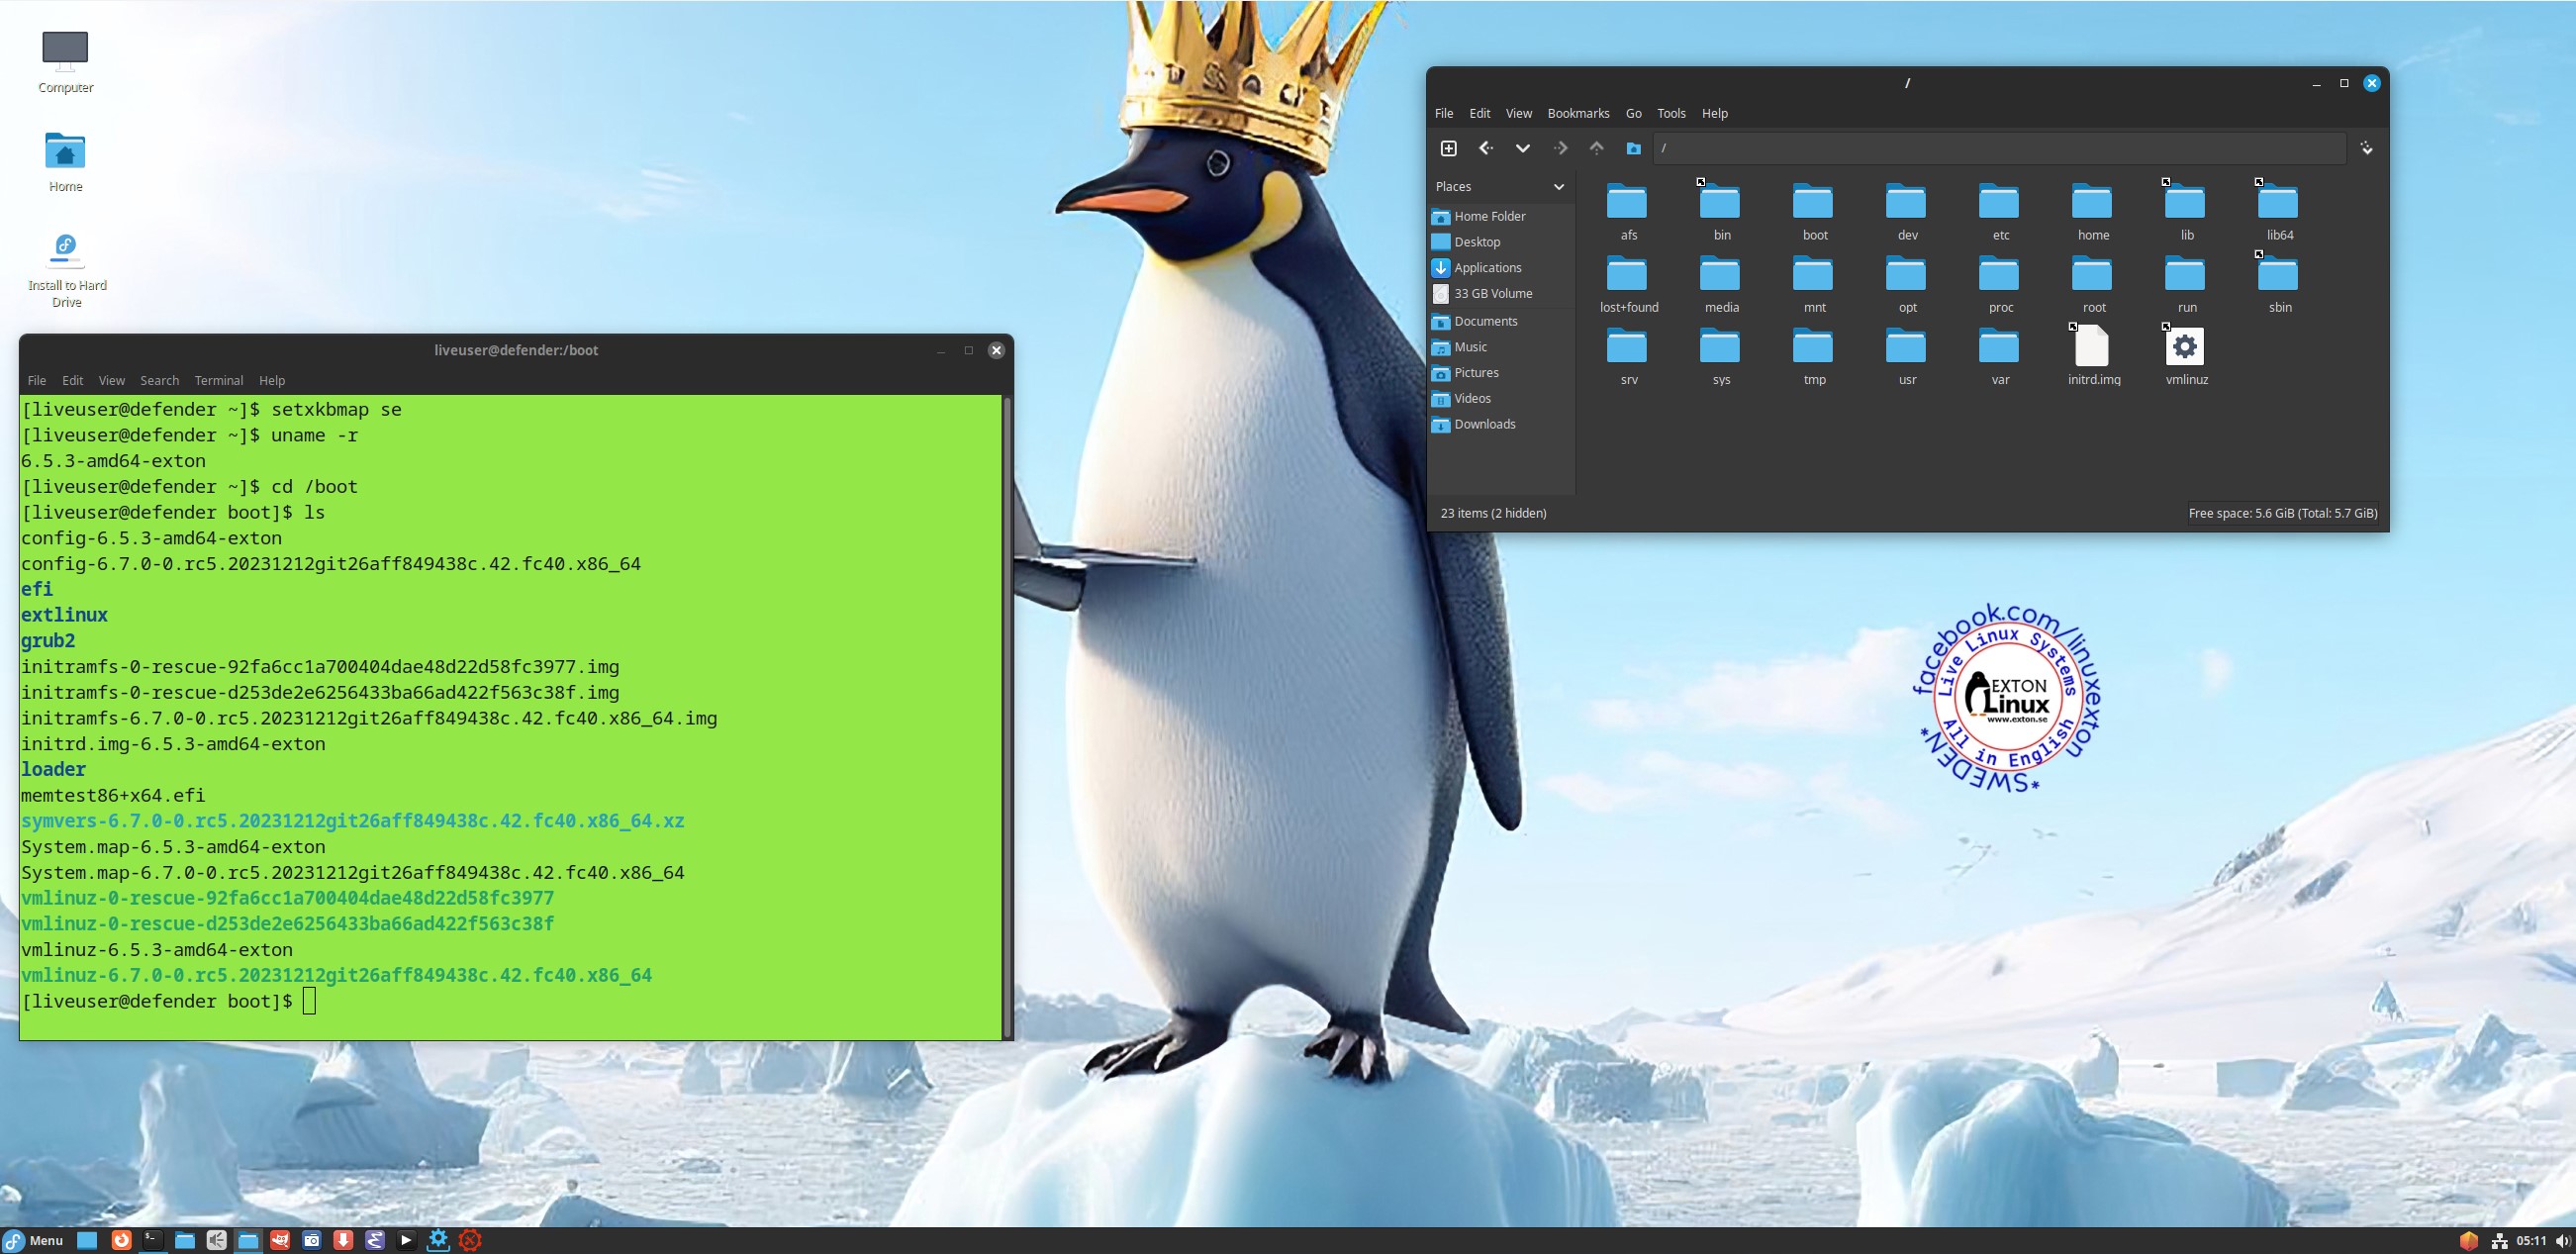
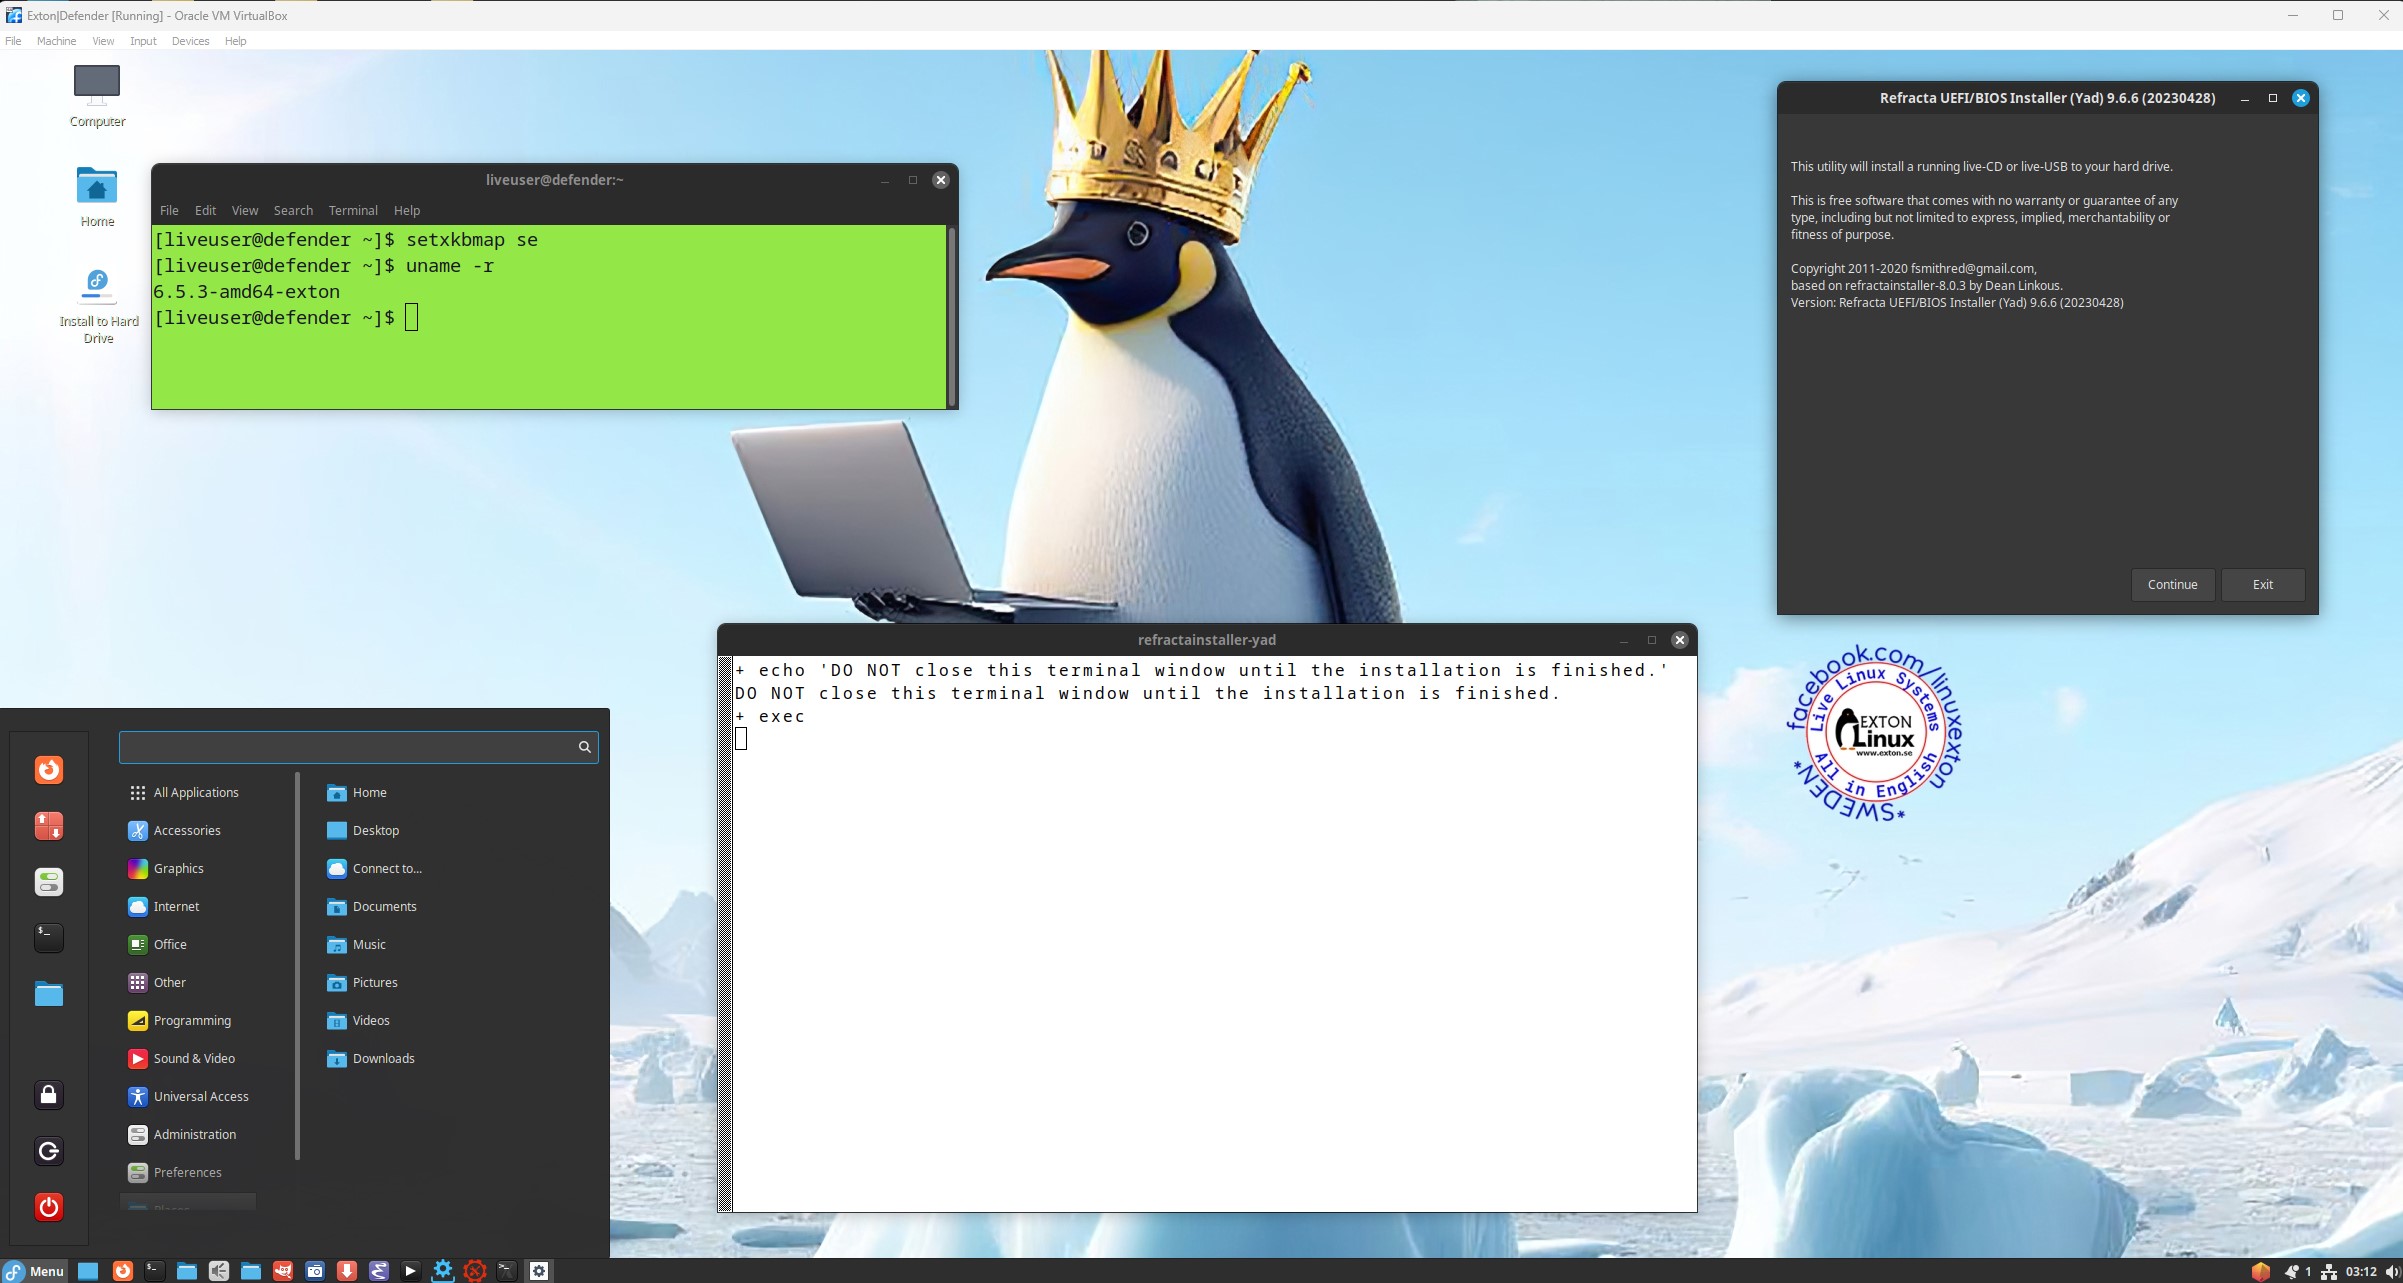
NOTE1: For Refracta Snapshot to work you have to run “my” kernel 6.5.3-amd64-exton when Refracta Snapshot is running. (It won’t work with Fedora’s kernel 6.7). IMPORTANT NOTE: Actually you can run Fedora’s original kernel 6.7-rc4/6.7-rc5 and still use Refracta Snapshot. Just don’t uninstall/remove “my” kernel 6.5.3-amd64-exton before running Refracta Snapshot. And don’t remove the links /vmlinuz and /initrd.img to my kernel. Your new ISO will then be created without problems. When running your new ISO live (i.e. from a USB stick/DVD or in VirtualBox/VMware) my kernel will be used. If you install your new Fedora/Exton|Defender System to hard drive Fedora’s kernel 6.7-rc4 will be used. Watch this screenshot…
NOTE2: Version 231212/231109 of Exton|Defender can run on really old computers. As an example I could run it on my 17 years old laptop Acer Aspire 5102 WLMi.
ABOUT the Cinnamon Desktop Environment
Cinnamon is a free and open-source desktop environment for Linux and Unix-like operating systems, deriving from GNOME 3 but following traditional desktop metaphor conventions. Read more about Cinnamon. And a review of Cinnamon 5.6.
ABOUT the Deepin Desktop Environment
Deepin DE (made in China!) is “devoted to providing a beautiful, easy to use, safe and reliable system for global users”. I came to like Deepin DE very much when I installed it in ExTiX and ArchEX. So I thought why not install the Deepin DE also in Exton|Defender? 

System Tools included
NTFS-3g, GParted, PartImage, Shred, Sfdisk (util-linux-ng), Rsync, Ddrescue, FSArchiver, TestDisk and Midnight Commander. Other programs (among many others): NetworkManager, Firefox, Parole Media Player, Samba, Java and Java Runtime Environment (JRE), Emacs, Safecopy, kernel headers and many compilation tools. Exton|Defender uses kernel 6.5.3-amd64-exton. Study all installed packages…![]()
About Fedora
Please read this overview.
Passwords and LOGIN
The password for liveuser is live. The password for root is root. If you (for some reason) want to run Exton|Defender as root you can do so. Just press Ctrl Alt F2 simultaneously to leave X. Log in as root and run the command startx. That won’t work on all computers though. At the LightDM login screen you can choose if you want to log in to the Cinnamon DE or Deepin. Default DE is Cinnamon. If you want to log in as root from a Login Manager you can install GDM. Command: “sudo dnf install gdm“. Watch this screenshot. Or use DNFDragora. When installing GDM you will also get Gnome 45.
Default language
The default language (locale) is set to English.
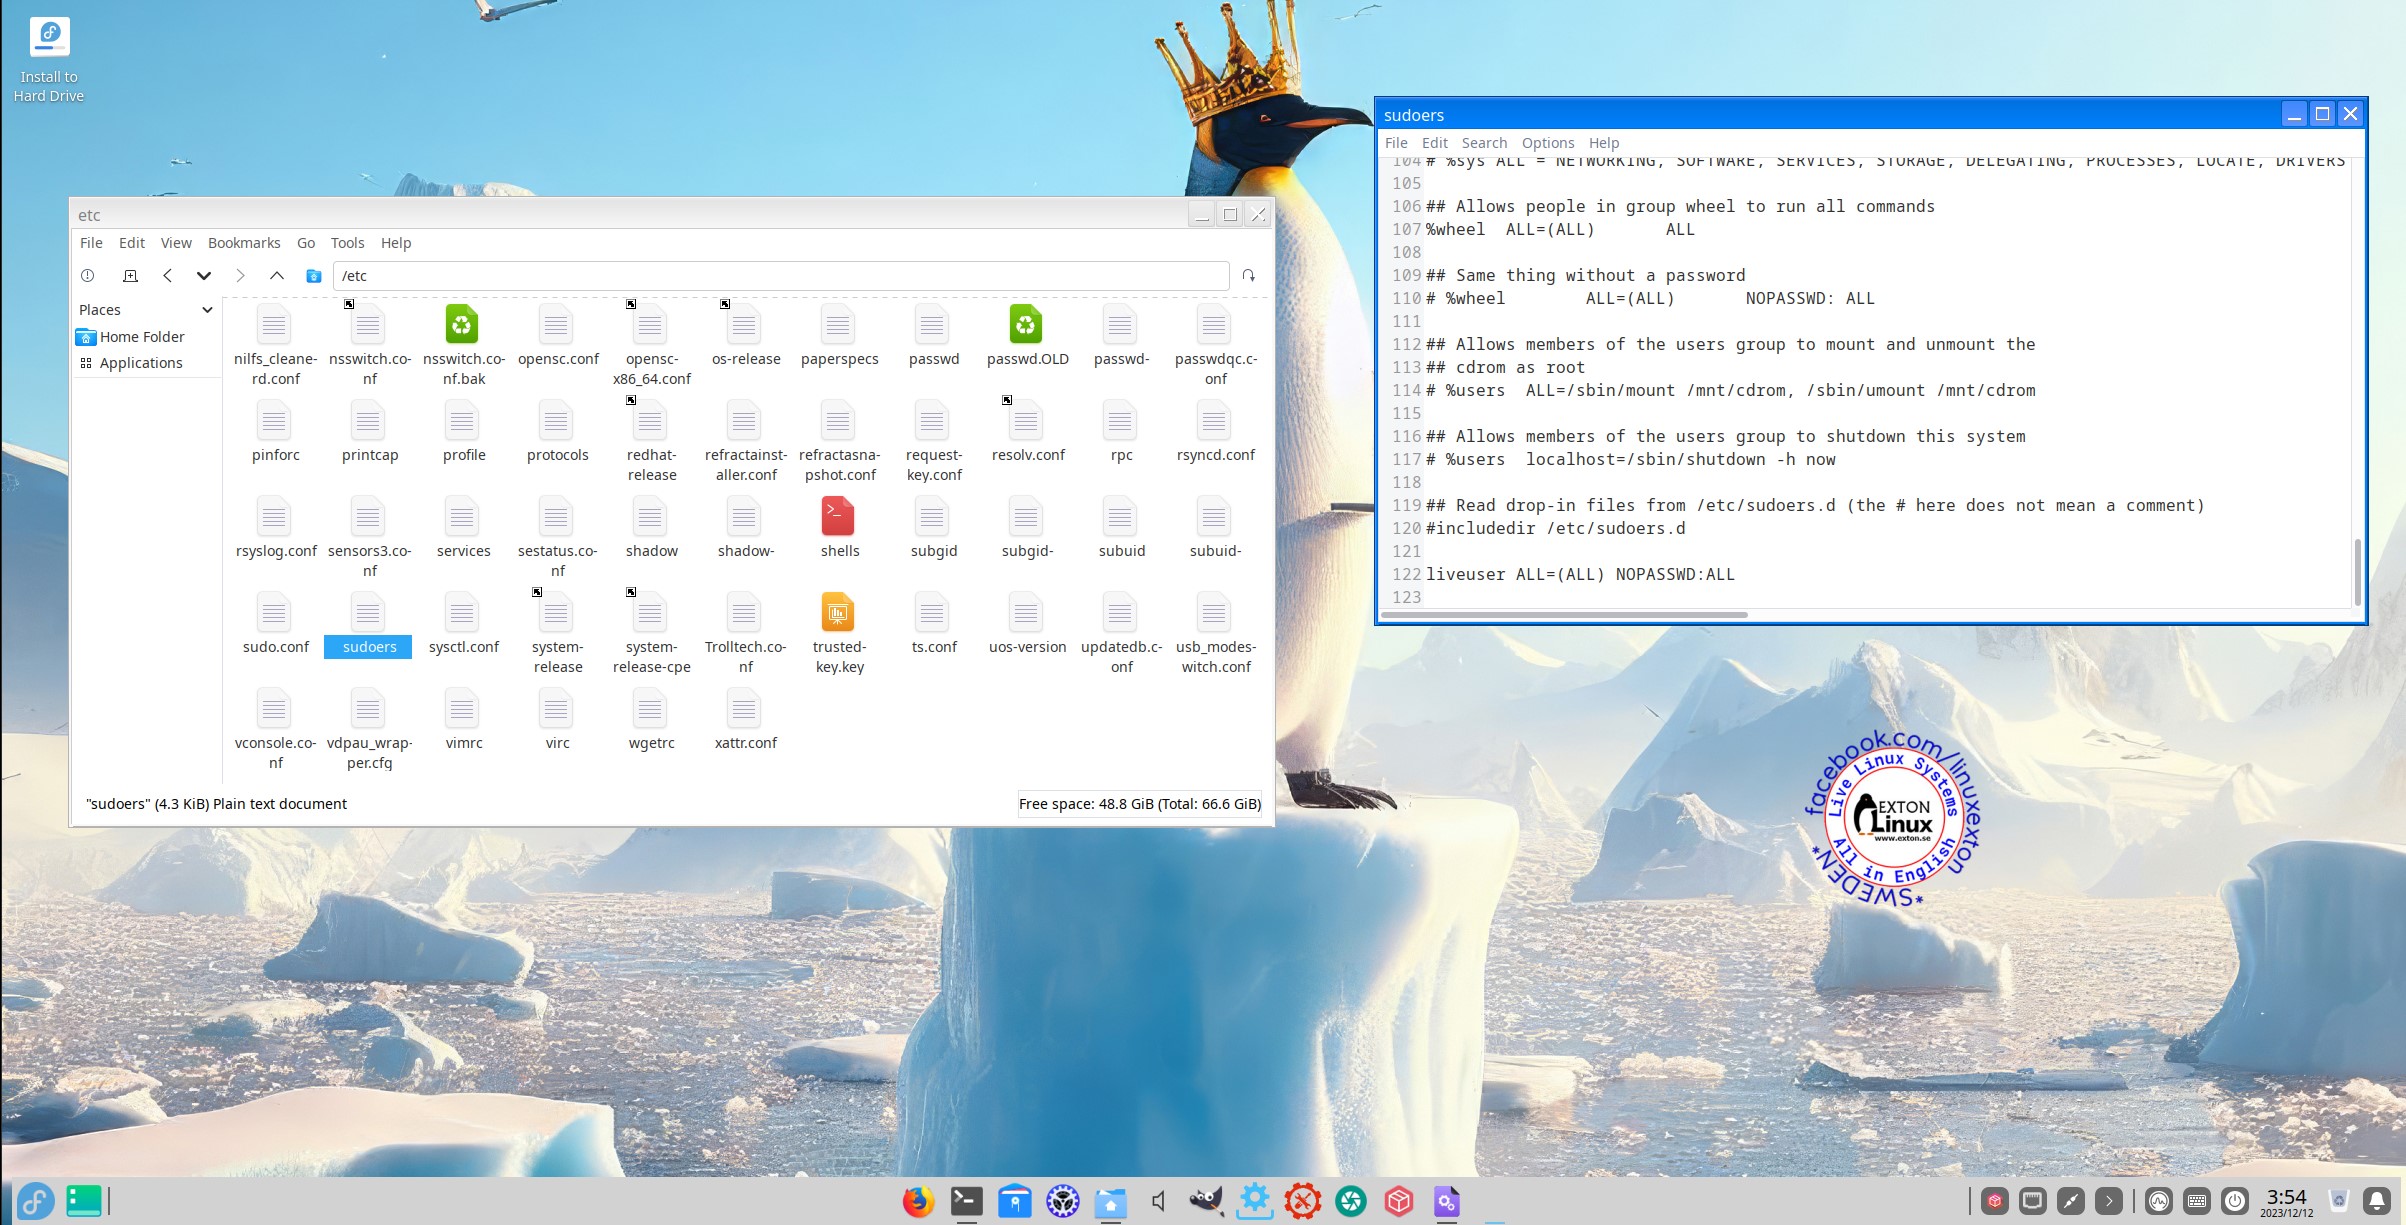
Sudo
Ubuntu/Debian/Mint and many other so-called beginner distributions (and other Linux systems) use Sudo to do something that requires root (superuser) privileges. There really is no need for a root password. “Examples of Command”: sudo mkdir /usr/MyFiles. Read HERE about how Sudo works.
DNF – Fedora Package Management
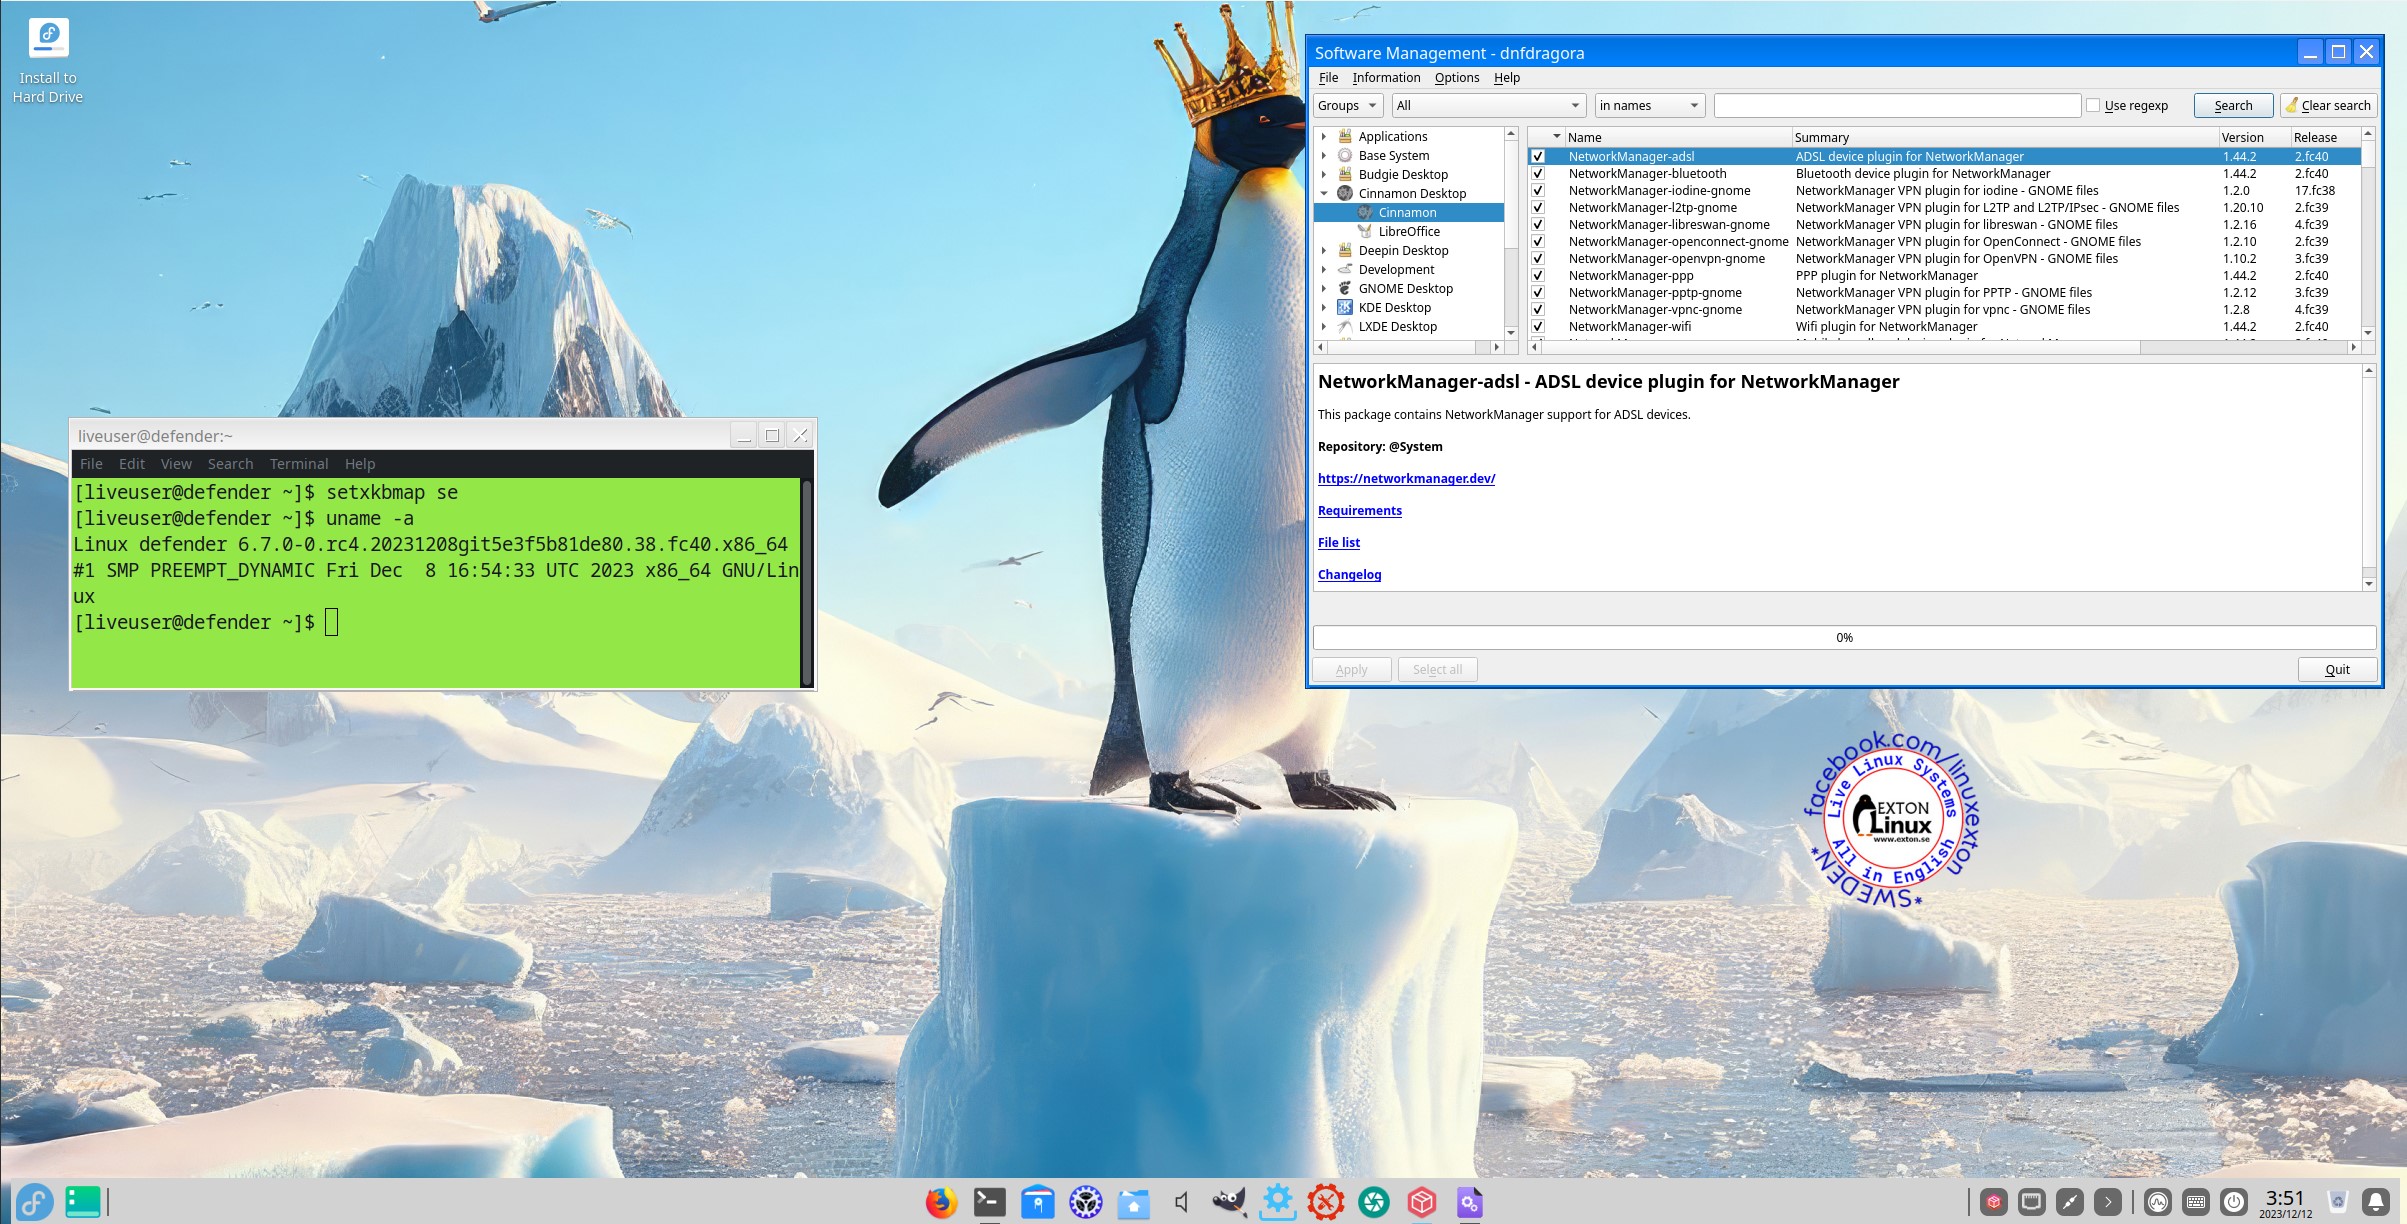
DNF is a software package manager that installs, updates, and removes packages on RPM-based Linux distributions. Used by Fedora. Basically you’ll only need two commands: dnf upgrade ‐‐refresh and dnf install MyGreatProgram. Read more about DNF. You can also use the Package Manager DnfDragora, which is pre-installed. It can be compared with Debian’s Synaptic. Watch a screenshot when DnfDragora is running…
The ISO-file is of 3340 MB. (A lot of packages are pre-installed).
Running Exton|Defender from a USB stick
It works very well. You can (of course) install new packages. For that you can use the command line (example: sudo dnf install gimp) or DnfDragora (“a dnf frontend”). Watch a screenshot when dnfdragora is running. Since persistence now can be enabled if you use Rufus for the installation (see my INSTRUCTION) most everything can be done while running Exton|Defender from a USB stick.
INSTALL Exton|Defender to hard drive using Anaconda
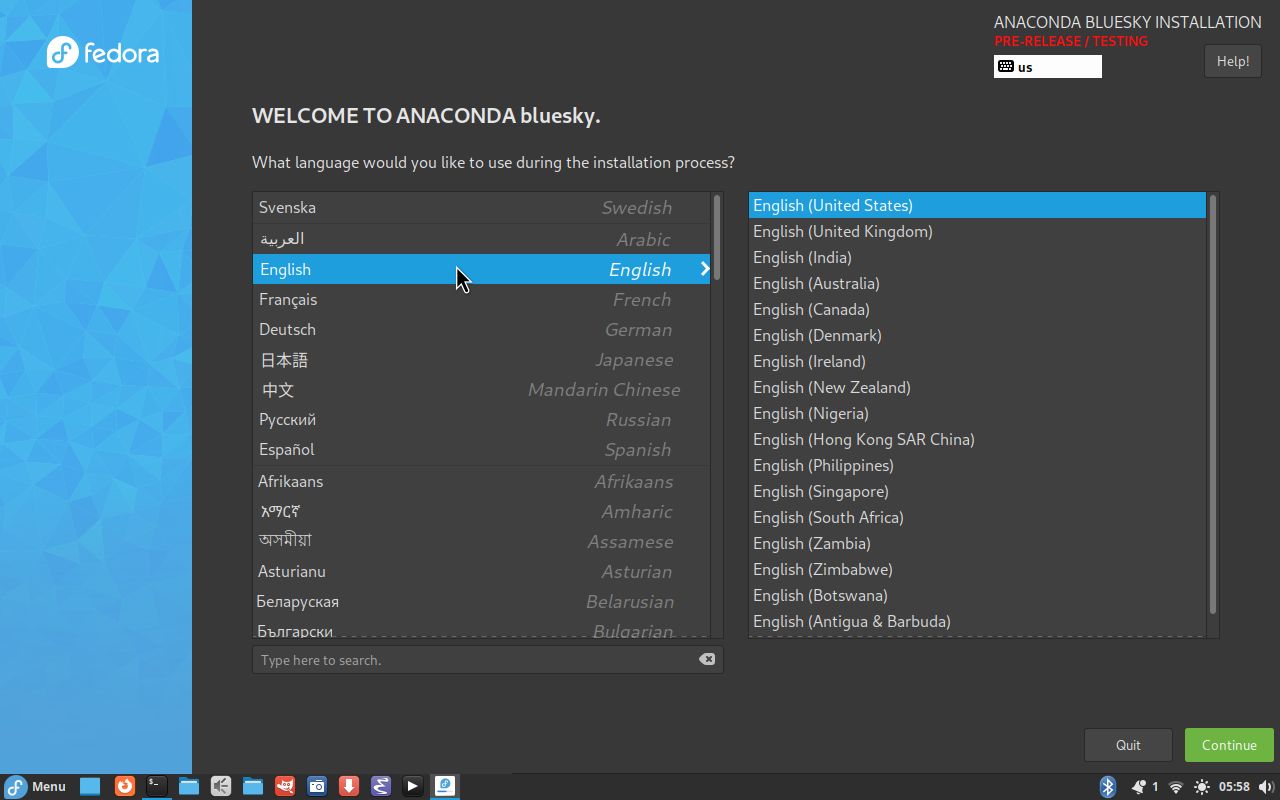
Use Anaconda (Fedora’s installer). Please read this INSTRUCTION. You can (if you want) use Grub2 as boot loader. IMPORTANT NOTE: Since this Defender Build is based on an unstable version of Fedora I must strongly discourage you from installing Exton|Defender on a computer where you already have other Linux systems (and perhaps Windows installed). You may mess up your current (working) boot loader. That said I also must say that Anaconda is a well known and “fairly sophisticated” installer. I did a “test install” of Exton|Defender on one of my computers without problems. I did not install Grub2 though, since I already have seven (7) Linux systems and Windows 11 installed. Please read my INSTRUCTION How to dual-boot, triple-boot or multi-boot Linux with Windows and be happy…
Note also: Be sure to install on a partition formatted with the ext3 filesystem – see above. Using Anaconda Installer has one big disadvantage. You will only get a basic Fedora Rawhide System. Nothing will be left of Exton|Defender. For example will Refracta Snapshot be gone! So is also “my” kernel 6.5.3-amd64-exton. After the installation using Anaconda (and a reboot) you must install some new packages for the System to be usable. Here is one example command: “dnf install cinnanmon Xorg xinit gdm firefox leafpad lxterminal pcmanfm“. Finally run the command “systemctl enable gdm” and reboot. After that you will be able to log in from GDM Login Manager to either Cinnamon or Gnome.
INSTALL Exton|Defender to HARD DRIVE using Refracta Installer
You can also use Refracta Installer preferable in VirtualBox. Using Refracta Installer is the best way to install to hard drive if you want an exact copy of Exton|Defender, which you later on can change to your liking. How to use Refracta Installer in VirtualBox:
1. Create the install partition with the ext3 filesystem and a SWAP partition in advance.
2. Start Refracta Installer from the menu
3. Follow the instructions. Be sure to choose an ext3 partition (not in VirtualBox though)
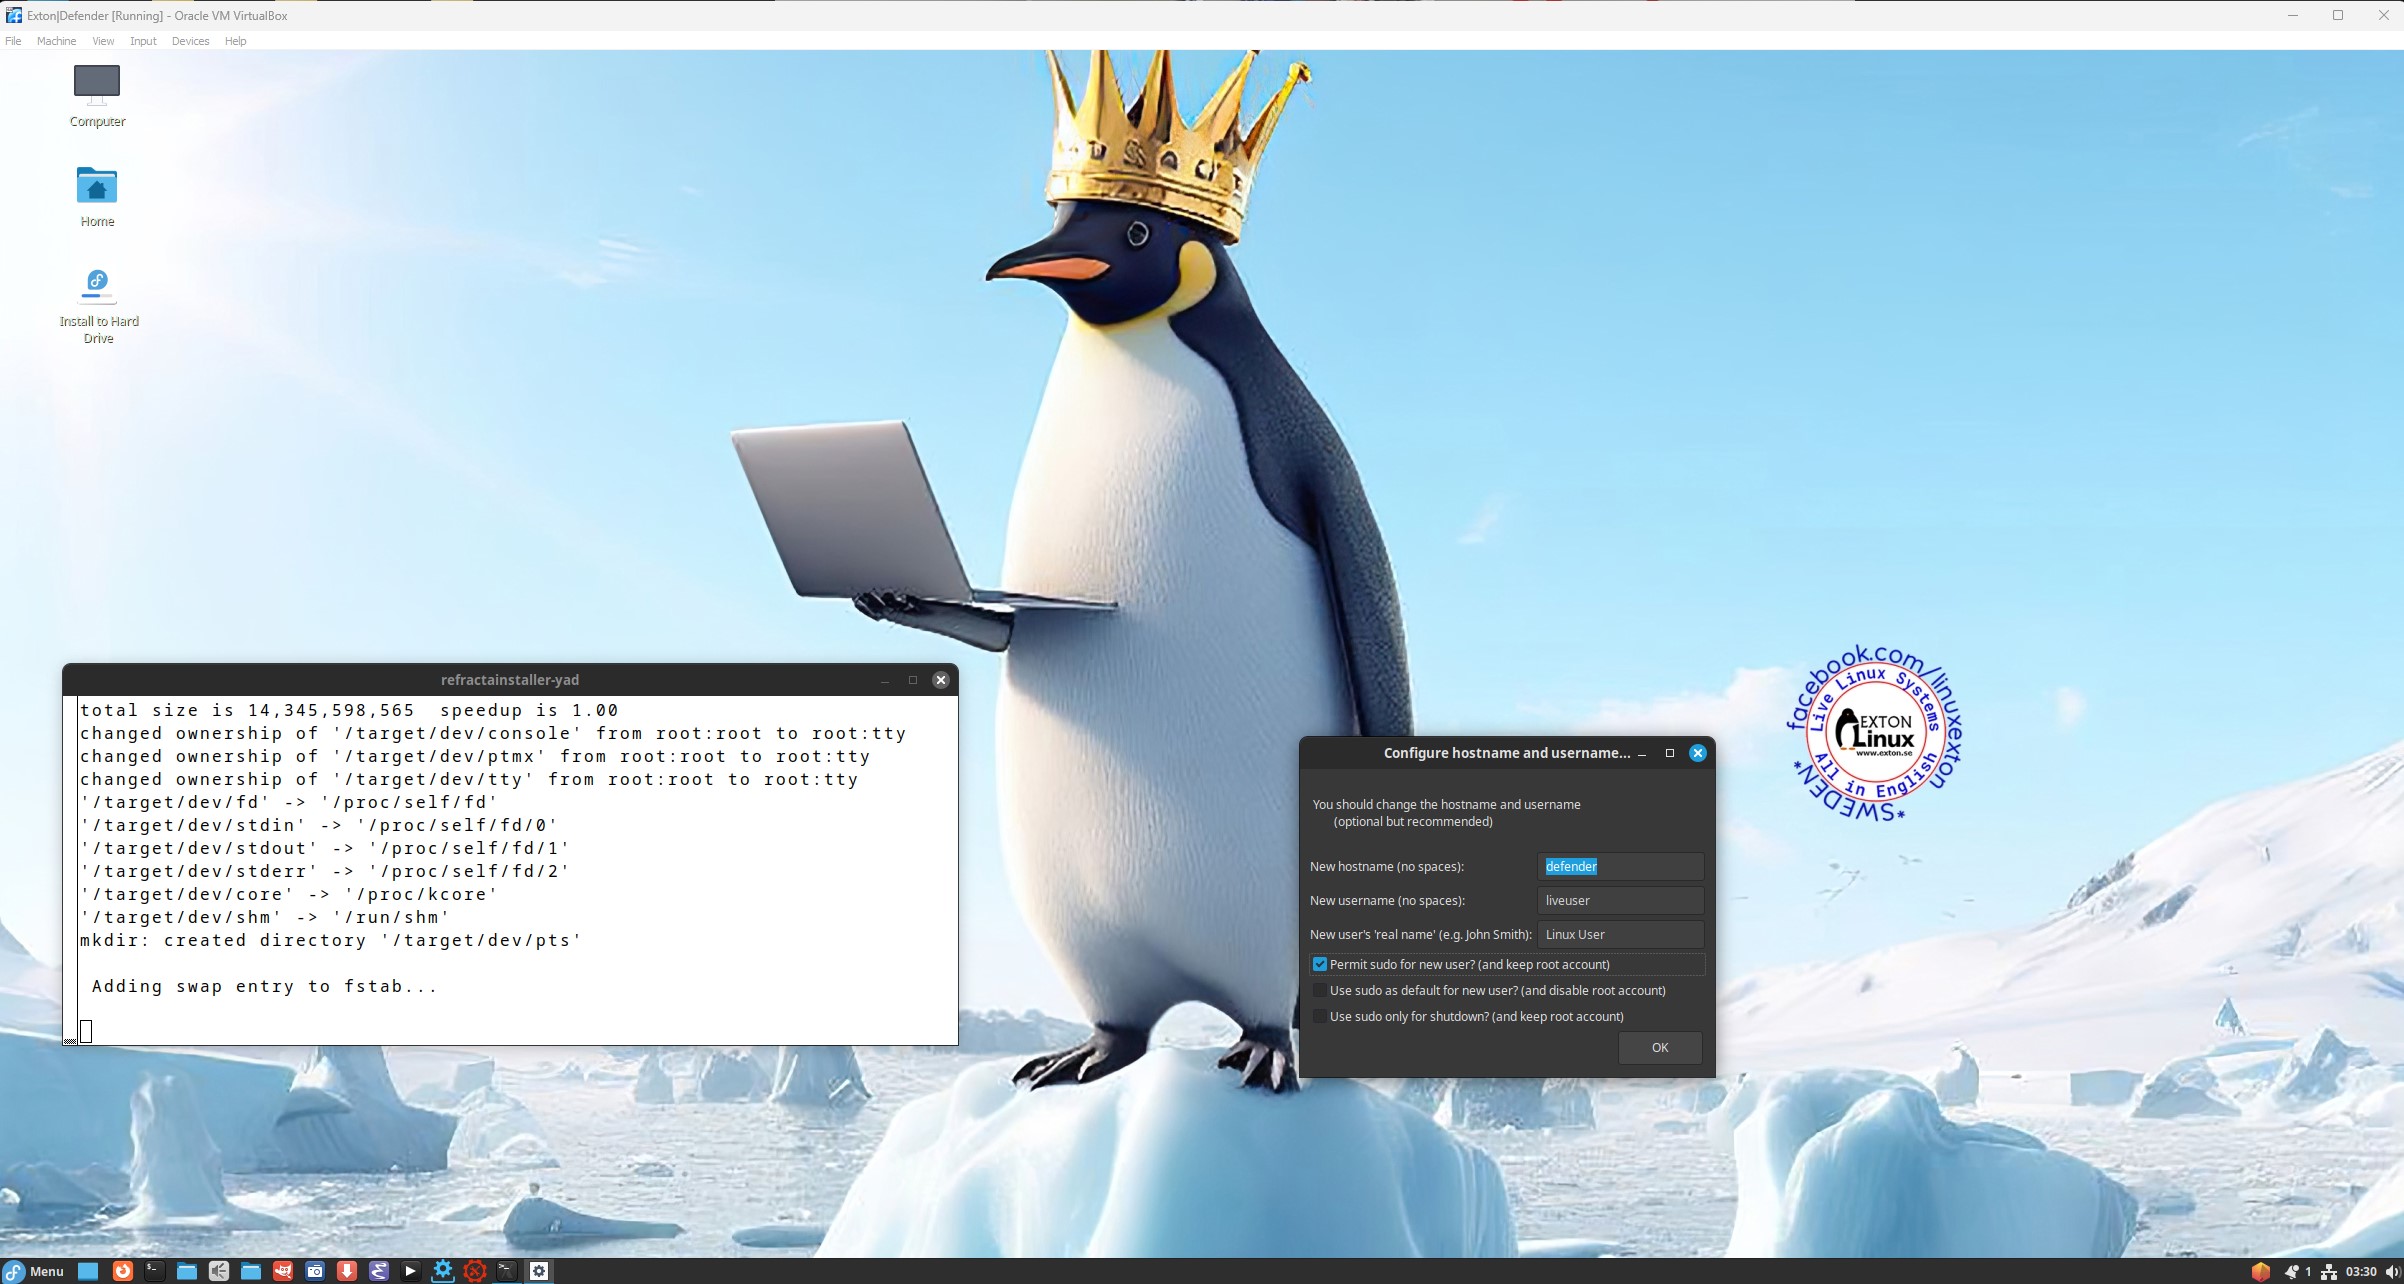
4. Refrain from installing Grub2 even if you need Grub as boot loader – watch this screenshot…
5. Chroot and install Grub2 (if you need it) – watch this screenshot…
Note that the file chroot-update-grub2-fedora.txt is in /home/liveuser. Just copy and paste from there.
Be sure though to install on a partition formatted with the ext3 filesystem – see above.
INSTALL Exton|Defender to a USB STICK
Use Rufus in Windows. About persistence read my INSTRUCTION!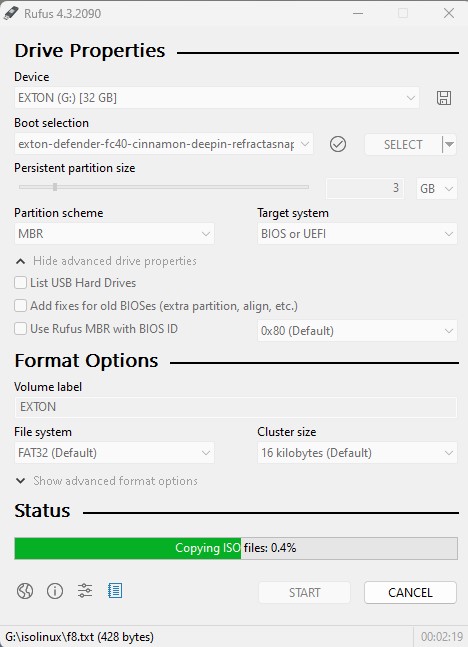
CONFIGURING X
X is auto-configured during the boot from the DVD disc or your USB stick. If not you’ll end up in console mode. Run the command sudo X -configure followed by sudo mv xorg.conf.new /etc/X11/xorg.conf. Then run startx. When running Exton|Defender on one of my computers with an Nvidia card I had to start in “basic graphics mode”. I.e. VESA. When automatically logged in to Deepin I pressed Ctrl Alt F2 and thus went into console mode. Then I ran the command init 1 to leave X. After that I could successfully run the above mentioned commands and re-enter Deepin with the command startx. The driver Nouveau was used!
Wireless connections
NetworkManager makes it easy to configure wireless connections. Give your WEP/WAP password and connect. That s it! You ll find the NM-applet to the right in the panel.
SAMBA
As regards Exton|Defender version 231212/231109 you can use PCManFM (file manager) to connect to your Windows computers in your Home Network. Watch this screenshot.
About running Exton|Defender in VirtualBox, VMware or Qemu
You can run Exton|Defender very well in full screen in all three virtualizers. To get perfect sound quality you may have to install some extra media codecs though. Use Dnfdragora for that. Watch a screenshot when Dnfdragora is running.
NOTE: In Build 231212/231109 all extra multimedia codecs are pre-installed.
Using Refracta Snapshot
As I said above you can create your own Fedora Rawhide System once you have installed Exton|Defender to hard drive. That can (of course) also be done in VirtualBox. Do it like this:
1. Be sure to run “my” kernel 6.5.3-amd64-exton. Refracta Snapshot won’t work with Fedora’s original kernel. IMPORTANT NOTE: Actually you can run Fedora’s original kernel 6.7-rc4/6.7-rc5 and still use Refracta Snapshot. Just don’t uninstall/remove “my” kernel 6.5.3-amd64-exton before running Refracta Snapshot. And don’t remove the links /vmlinuz and /initrd.img to my kernel. Your new ISO will then be created without problems. When running your new ISO live (i.e. from a USB stick/DVD or in VirtualBox/VMware) my kernel will be used. If you install your new Fedora/Exton|Defender System to hard drive Fedora’s kernel 6.7-rc4 will be used. Watch this screenshot…
2. Change everything to your liking. I.e. install/remove software, change wallpapers etc…
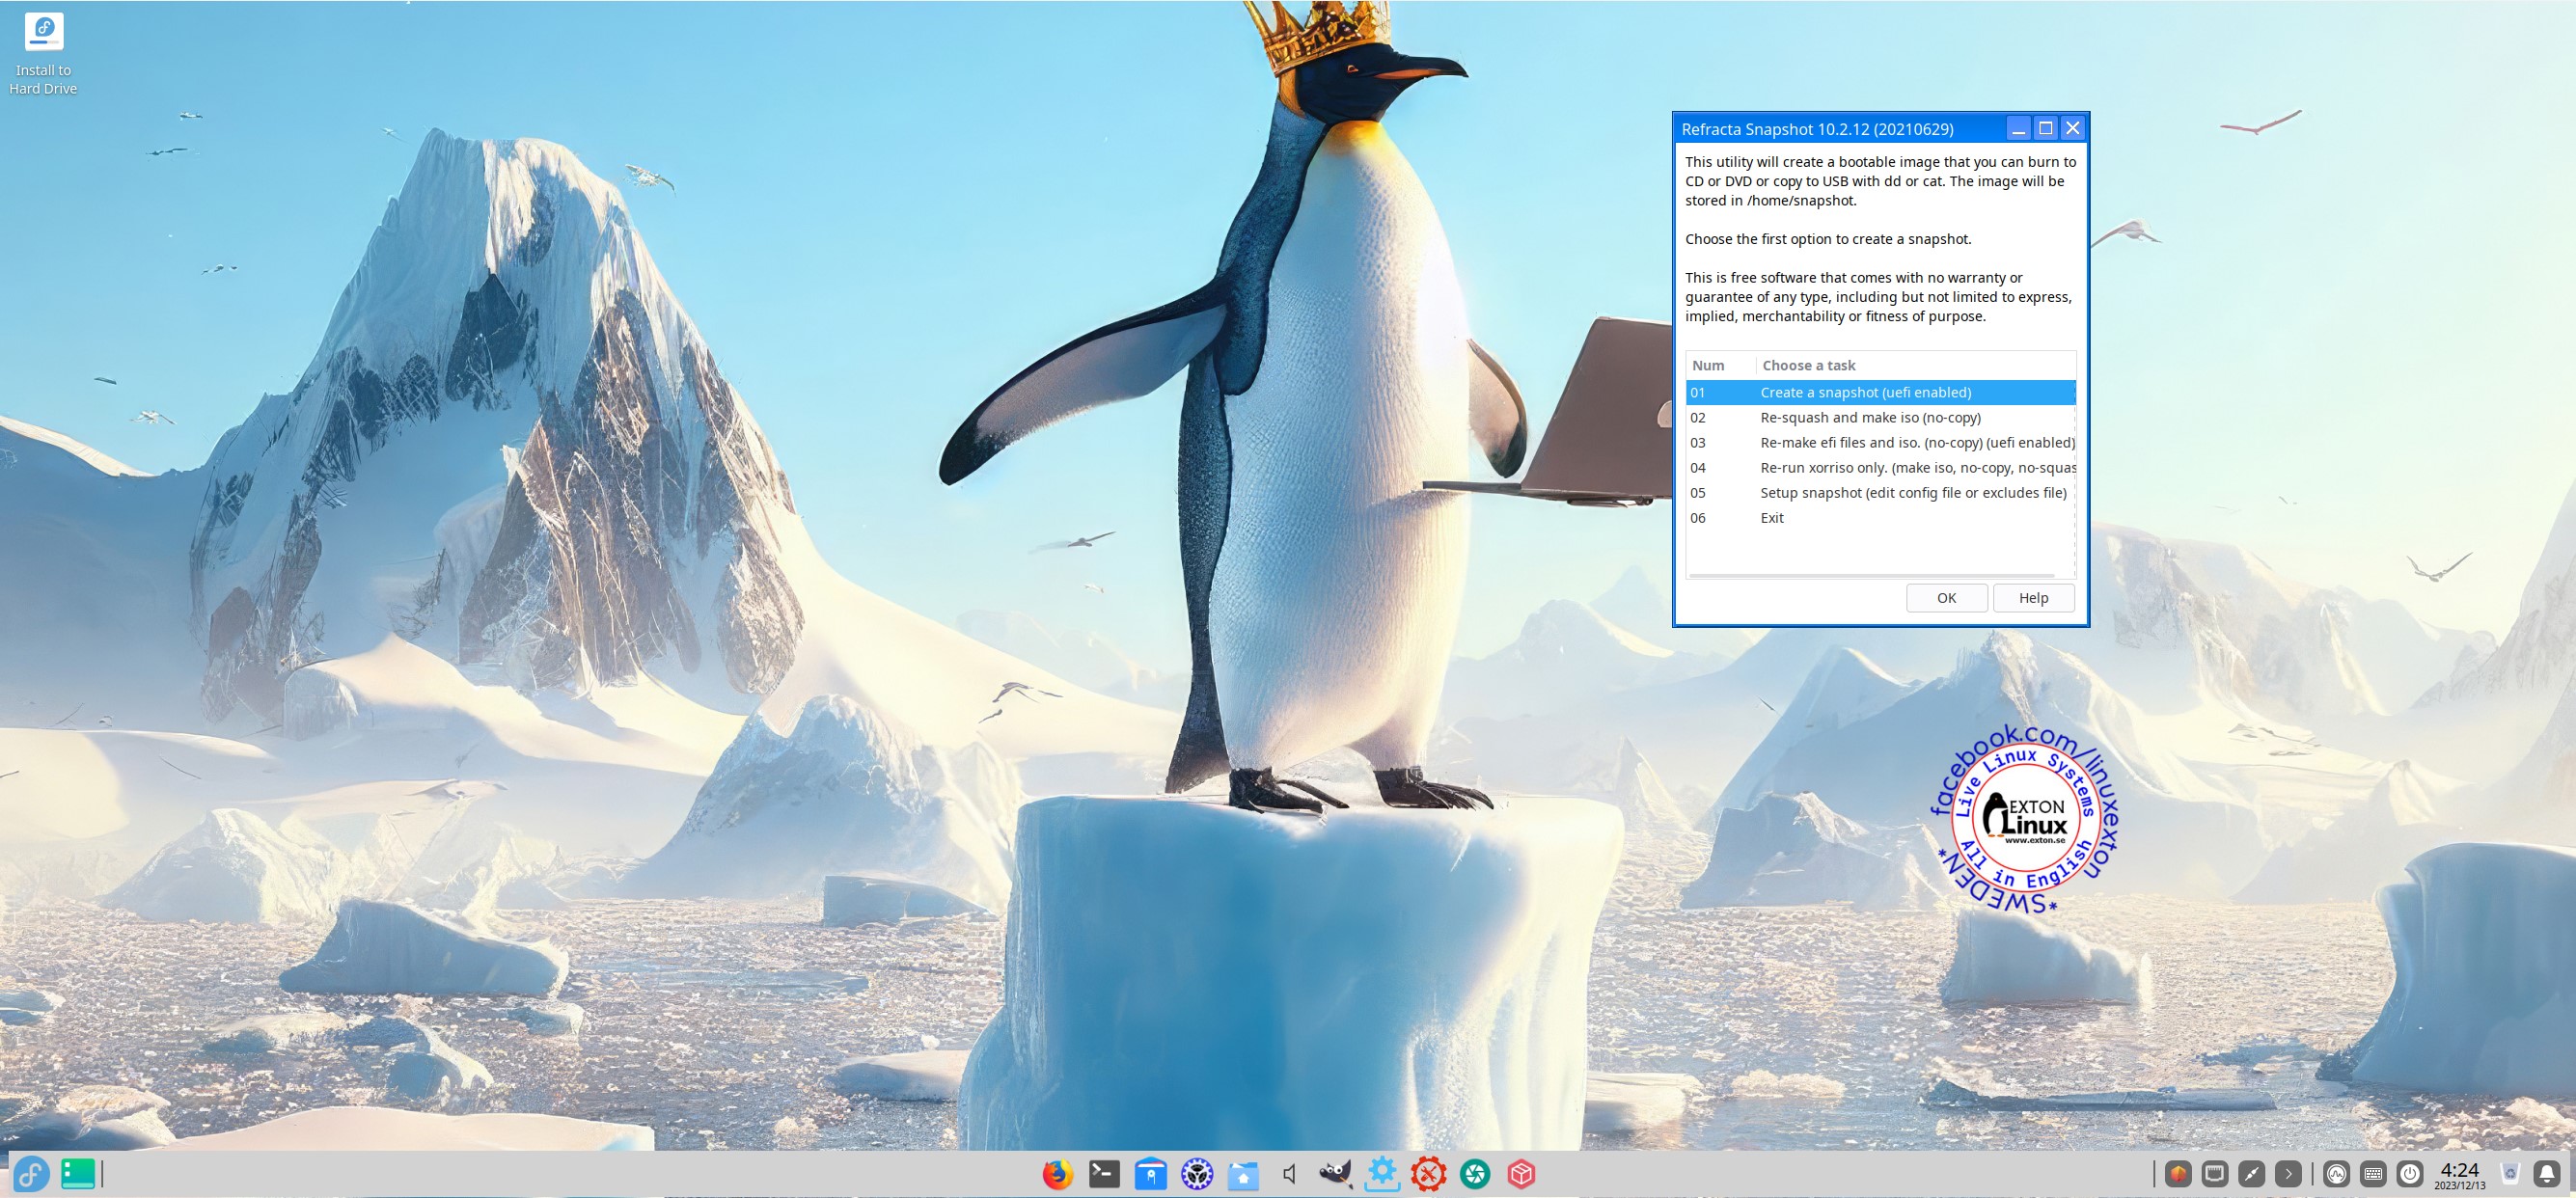
3. Open up a terminal and run the command sudo /usr/bin/refractasnapshot
4. Follow the instructions – watch this screenshot…
5. Sit back and relax. You new ISO will be ready in a few minutes. You’ll find it in /home/snapshot.
You can also use Refracta Snapshot while running Exton|Defender from a USB stick – see above!
THE IMPORTANCE OF Exton|Defender being based on upcoming Fedora 40
Programs won’t “crash” or anything like that. And I haven’t noticed any “bugs”. That said you should of course be a bit careful. This version of Exton|Defender is for people who like to use “cutting-edge” software and the latest kernels etc. You will always have the latest Linux/Fedora software installed if you regularly run the command sudo dnf upgrade ‐‐refresh or just sudo dnf upgrade.
SCREENSHOTS
Screenshot 1 – Exton|Defender – running in full screen in VirtualBox
Screenshot 2 – Anaconda (Fedora’s Installer) has started
Screenshot 3 – Refracta Installer has started
Screenshot 4 – Deepin DE is used
Screenshot 5 – Refracta Snapshot has started
Download
Exton|Defender can be downloaded from SourceForge.net – Fast, secure and free downloads from the largest Open Source applications and software directory DOWNLOAD
md5sum for the Exton|Defender version 231109 (Fedora 40) ISO file of 3340 MB![]()
| Feedback Fedora 39/40 is at least as “good” as Ubuntu 23.10/Linux Mint and/or OpenSUSE Tumbleweed. I think. Tell me what you think of Exton|Defender SRS in combination with the Deepin Desktop. Did you find the included Rescue System Tools useful? |
Contact
Android-x86 Custom
![]()
andex.exton.net latest is AndEX 11 (with GAPPS), AndEX 10 (with GAPPS) and AndEX Pie 9.0 (also with GAPPS)!
and
about my Android 13, 12, 11, 10, Pie, Oreo, Nougat, Marshmallow and Lollipop versions for Raspberry Pi 4 and 3/2 at
raspex.exton.se latest is RaspAnd 13 and 12 (without GAPPS), RaspAnd 11 (with GAPPS) and RaspAnd Oreo 8.1 (also with GAPPS)!
Lost your password?
Leave a Reply
You must be logged in to post a comment.